


Proper communication between the dentist and the dental lab is crucial to fabricating clinically acceptable dental restorations. These restorations must meet the clinical expectations of the dentist and the esthetic desires of the patient. The cases that can be deemed successful, in most cases, are those where the clinician has taken the time to understand the patient’s concerns and has effectively communicated those concerns to the lab. In addition, cases that include a mock-up of the planned case provide the dentist, the patient, and the dental lab with all the information needed to create a successful final case.

Burbank Dental Lab had the pleasure of working with Matthew Christie, DDS of James Island Family, Cosmetic, and Implant Dentistry on the following E.MAX case.
E.MAX Case Study
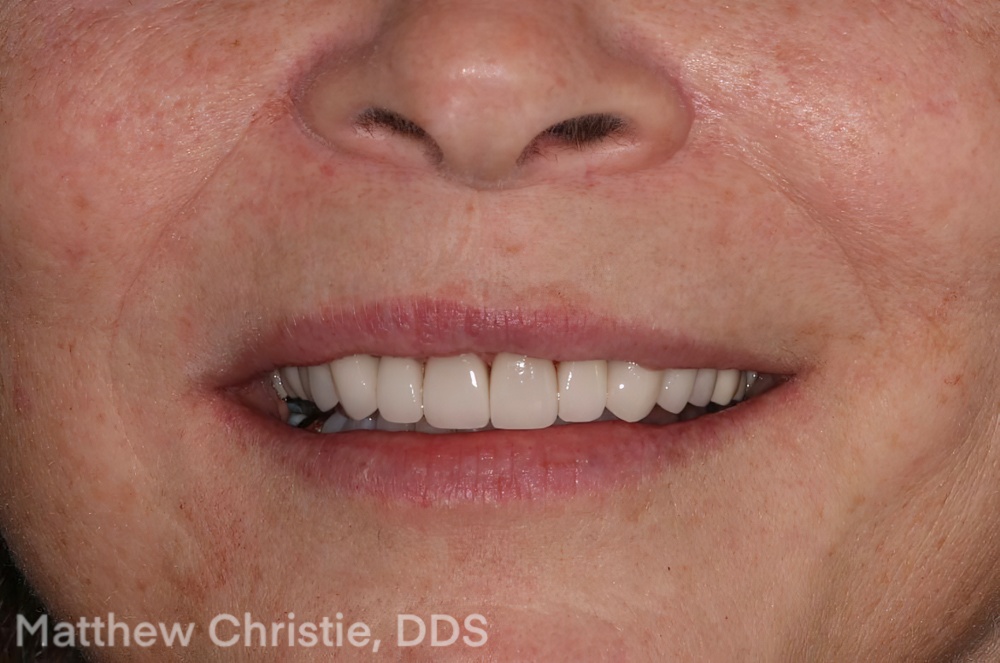
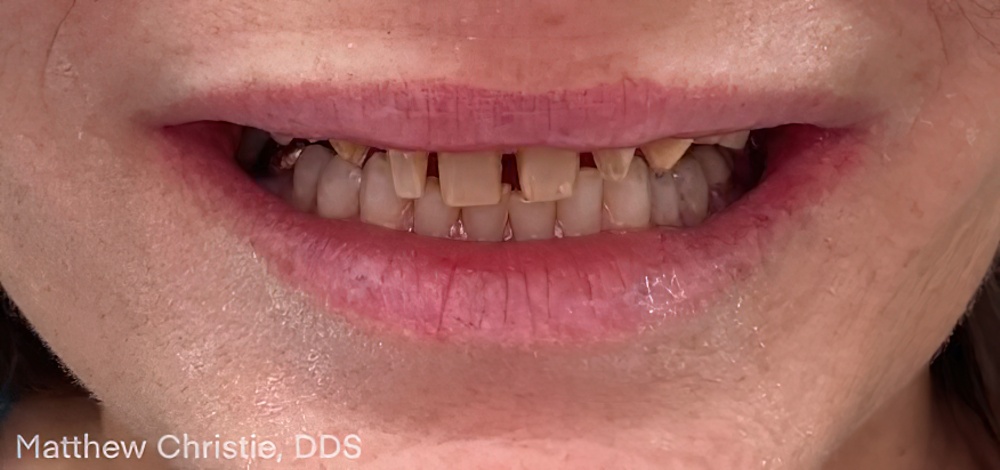
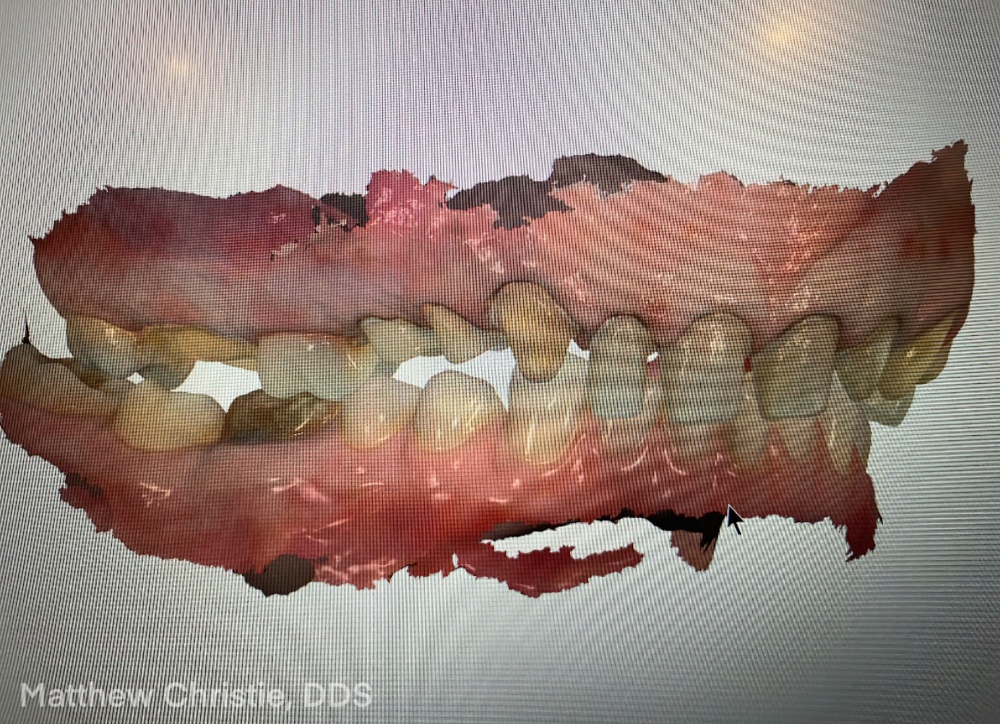
The patient presented to Dr. Christie with veneers that were about 15 years old and showing signs of wear. Tooth #6 was ankylosed, and this presented an esthetic challenge. After discussing the benefits of periodontal surgery with the patient, she declined this treatment. However, she expressed a desire to redo her veneers to improve and refresh her smile.
Wax-Up
An initial wax-up is recommended in a case like this. Using the initial plan to base the wax-up on is an important step in the fabrication process and should not be skipped. This step allows the technician to create a mock-up based on case information, including patient preferences.
Through this step in the workflow, the technician can discover any potential issues with the case, and it provides the patient with the ability to try-in the proposed new teeth before the finals are fabricated.
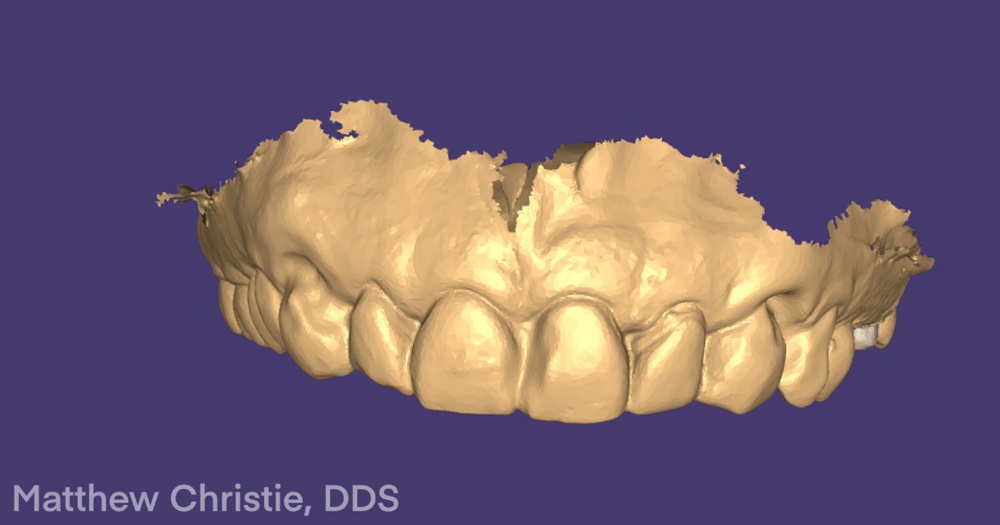
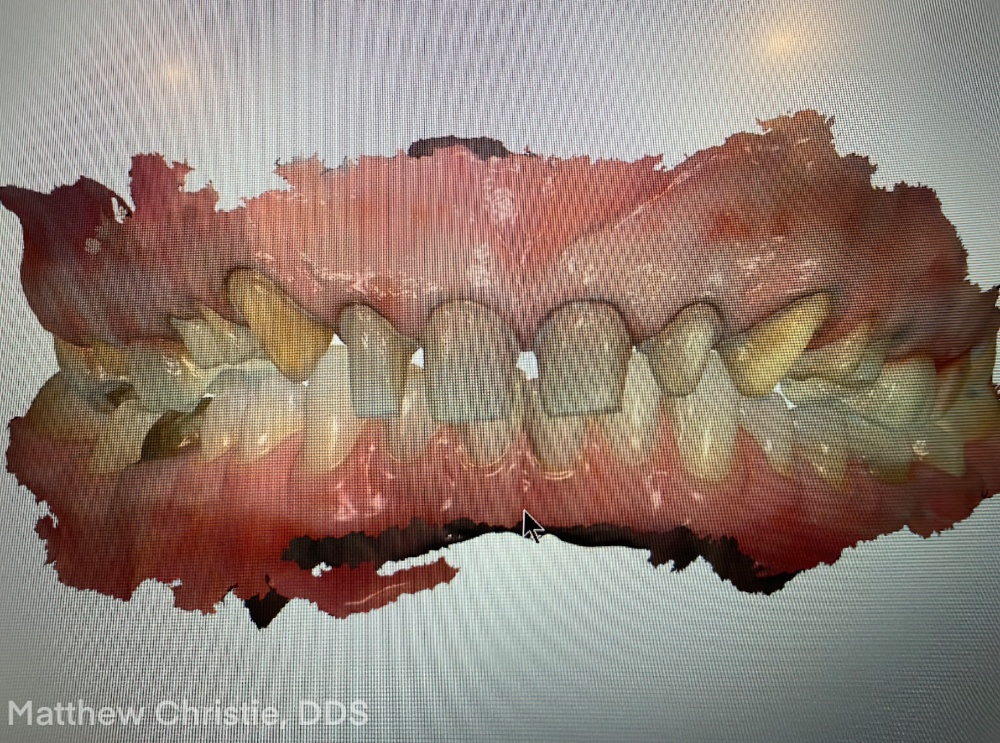
This case was done using a digital workflow. Dr. Christie took a scan of the patient’s jaws, both upper and lower. These files were uploaded to Burbank Dental Lab through the digital portal on the website.
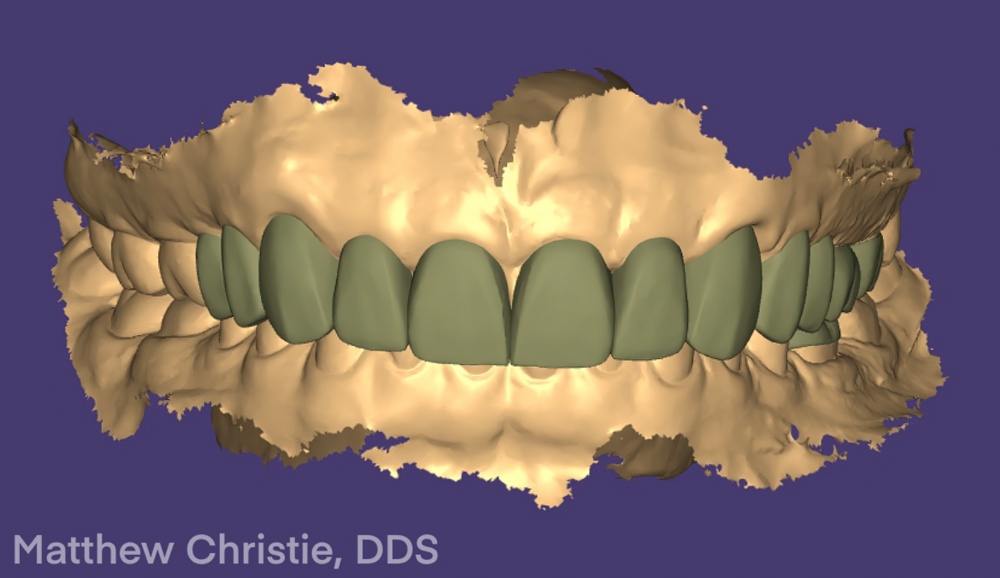
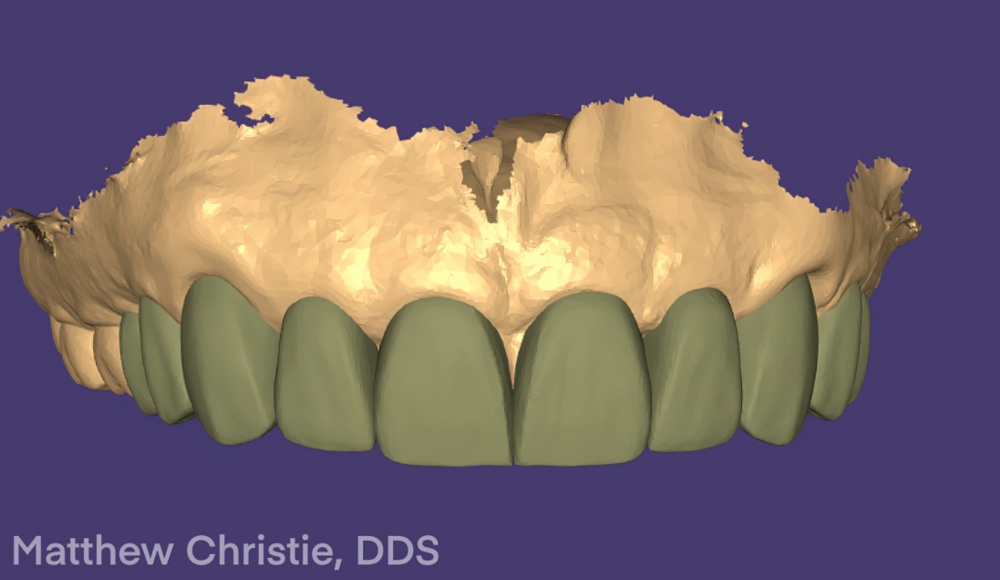
The case was then digitally mocked up according to Dr. Christie’s specifications. This mock-up was sent back to Dr. Christie for his and the patient’s approval.
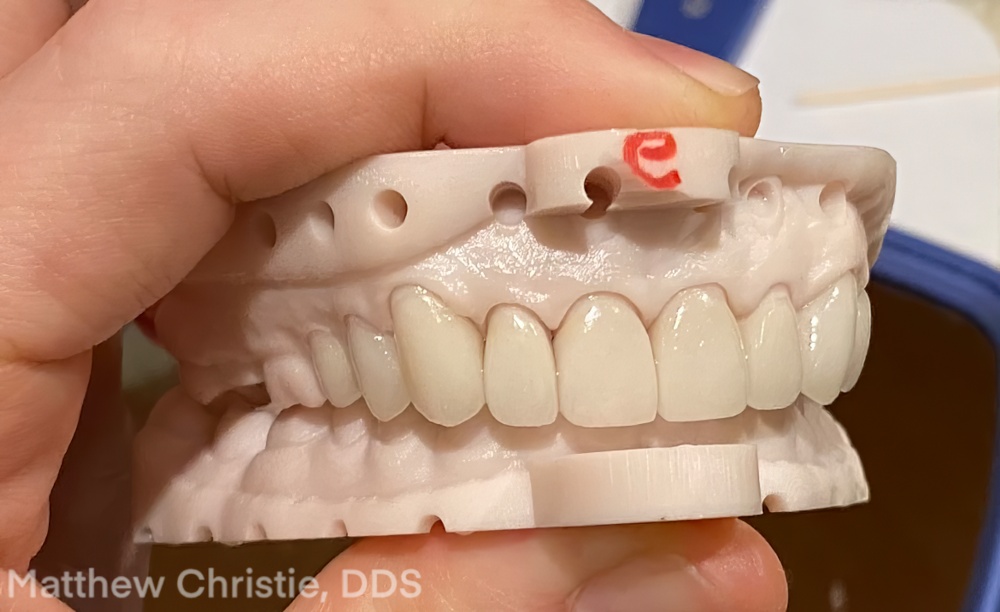
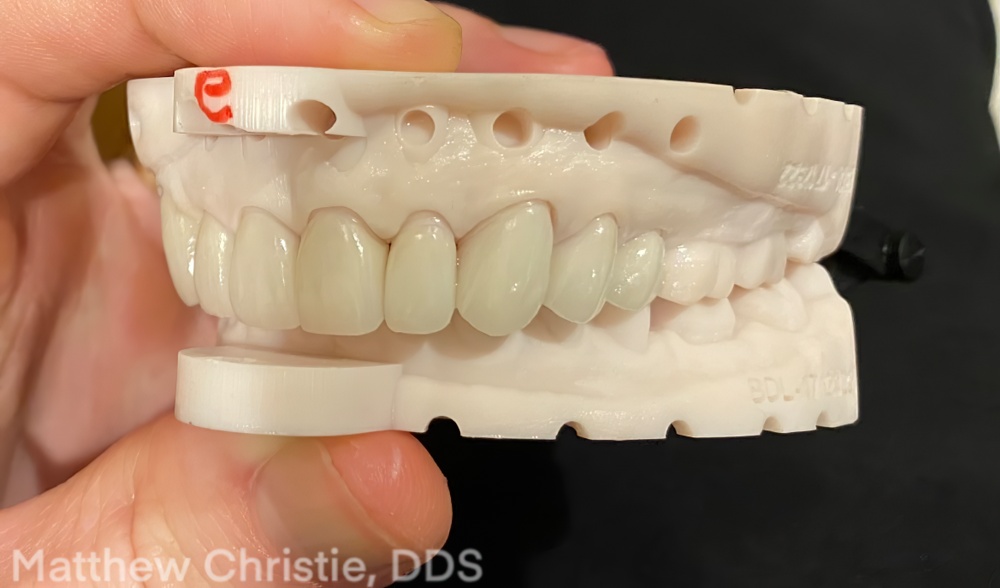
Provisional Try-In
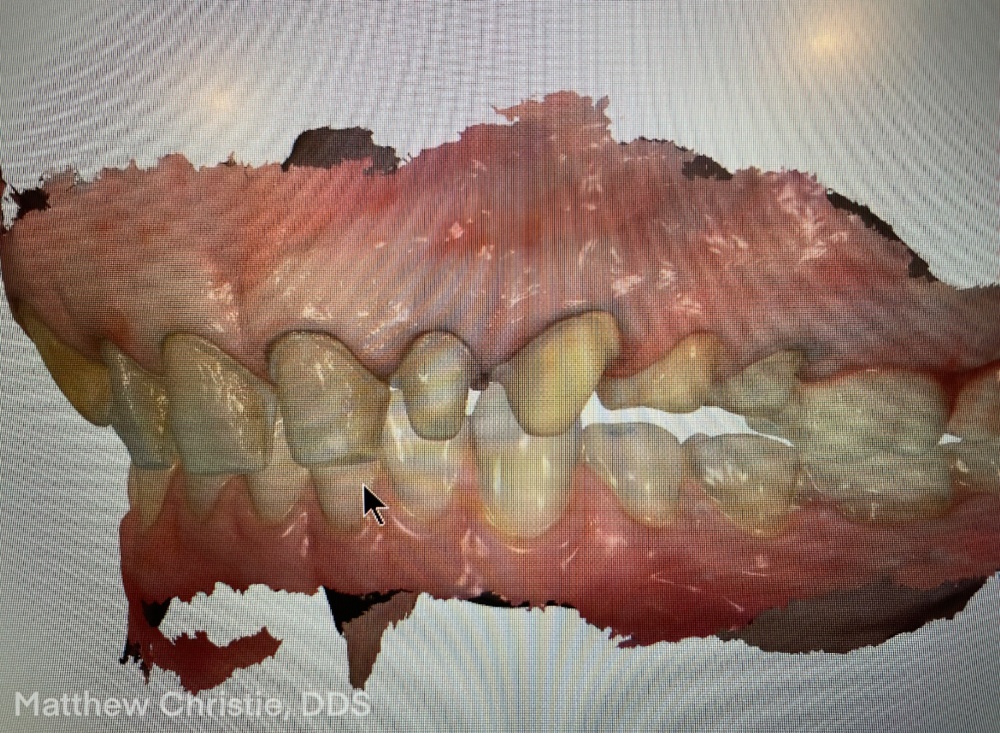
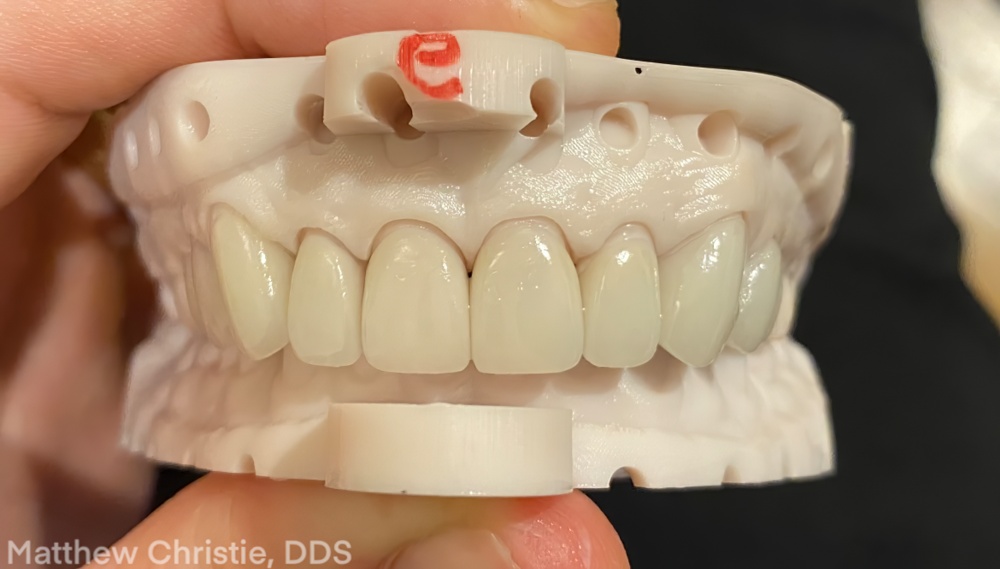
Dr. Christie next used a 3D-printed model to transfer the digital mock-up to the patient’s mouth. The mock-up was adjusted until the results of both Dr. Christie’s and the patient’s desired look were met. This patient wanted the shape of the teeth to be a bit softer and more rounded. Dr. Christie adjusted teeth 9-11 and provided a photo to communicate the desired look to the lab (see image below).
Once the patient approved the design, pictures were taken with the new design to be used in the final fabrication.
Preparation and Digital Impressions
The case was then ready for preparation to receive E.max Press Layered restorations on 4-13.
Once the teeth were prepared, both the upper and lower arch were digitally impressed along with the bite registration.
Shade Information
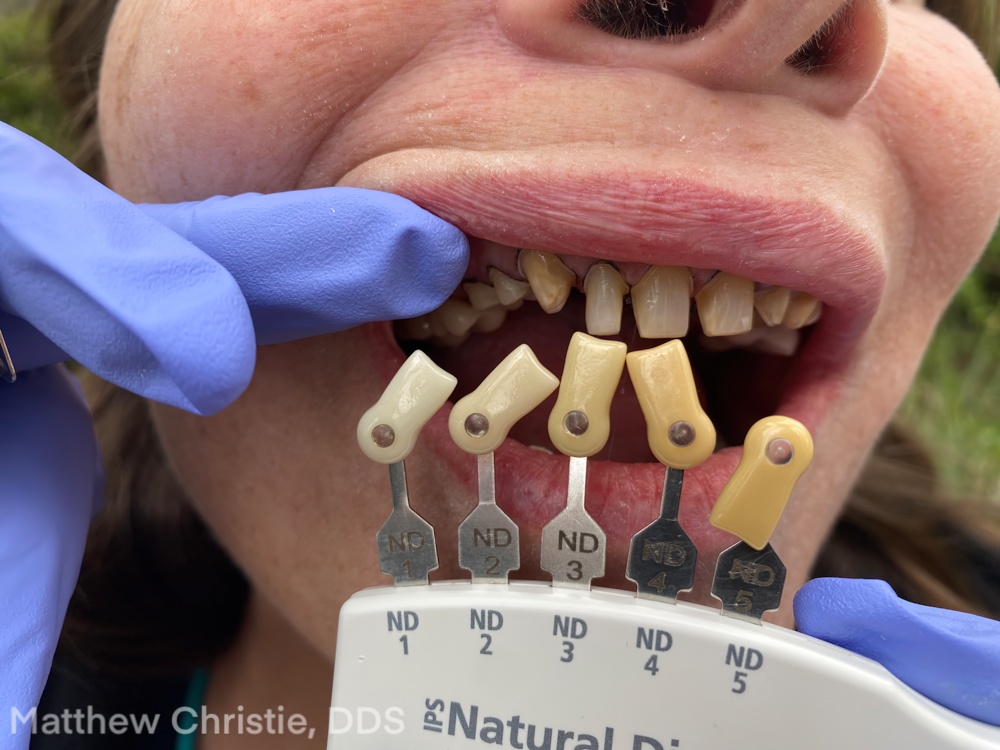
To properly achieve the desired shade results and meet the patient’s final color expectations, Dr. Christie began the shade discussion by recording the shade that matched the sclera of the eye. It has been shown that there is a correlation between the color of the sclera and the tooth shade. By using this as a guide in final tooth selection, the patient’s overall facial esthetics results in a more balanced look.
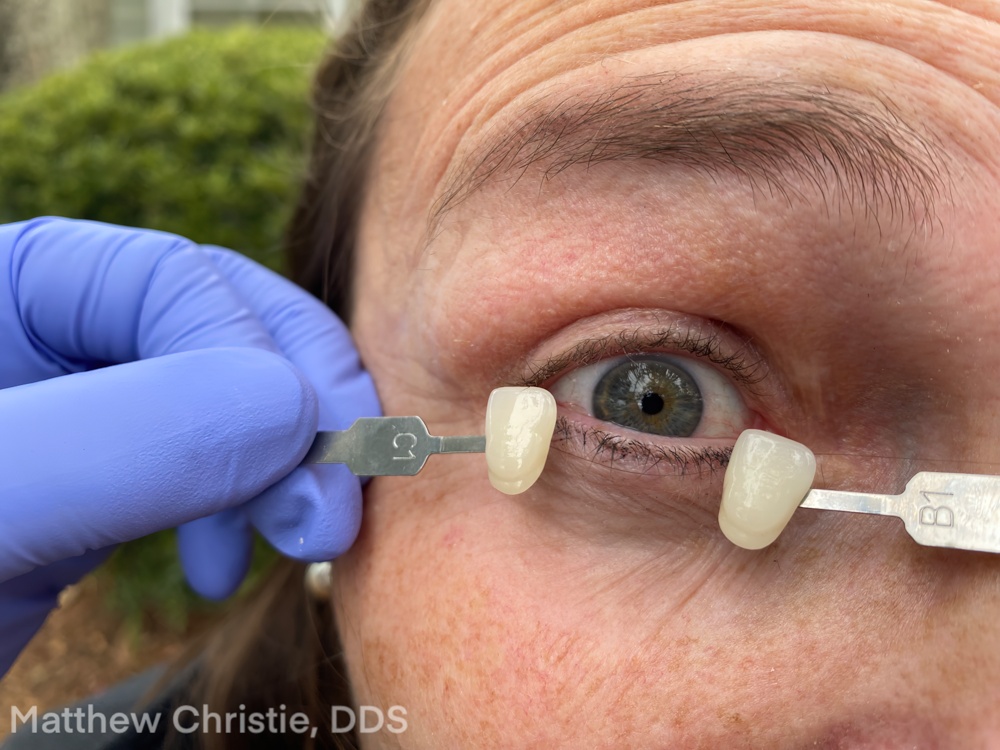
In addition, Dr. Christie provided the shade of the teeth after preparation. This, of course, is important in helping Burbank Dental Lab choose the best E.max ingot to achieve the desired end result.
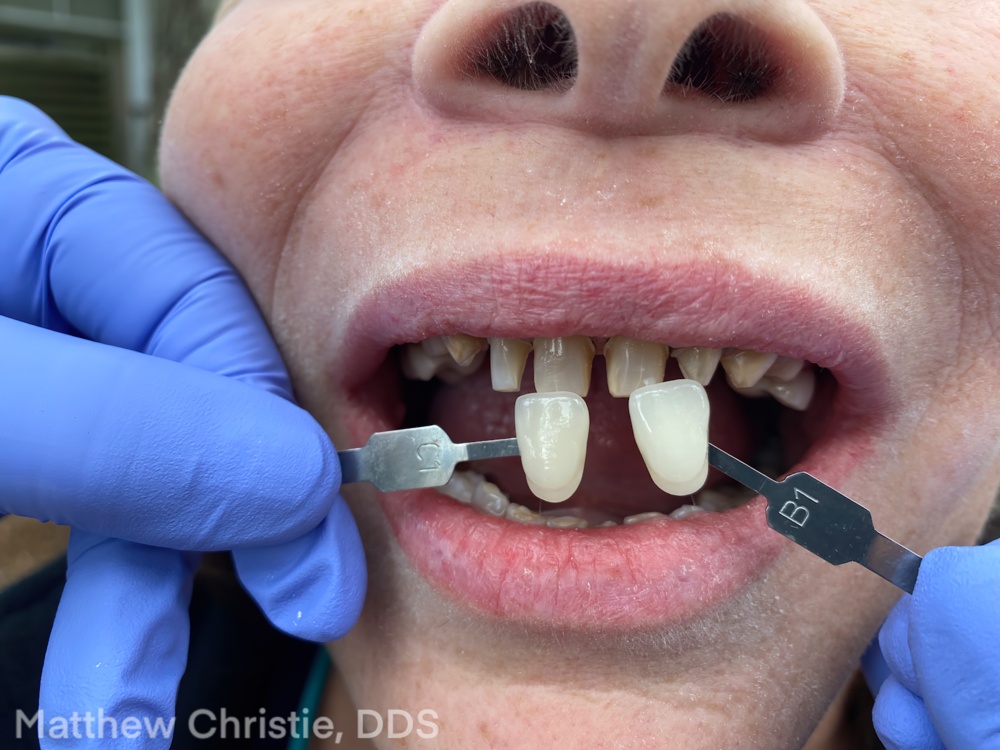
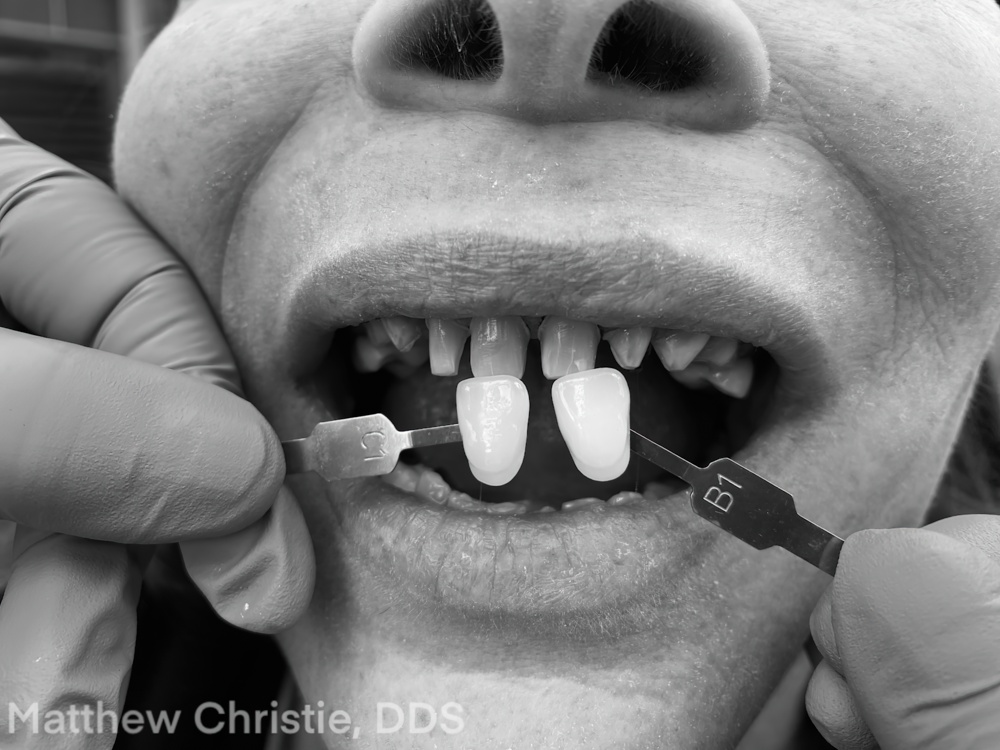
It is always important to send photographs with the shade tabs held up next to the teeth. While color pictures are a must, it is also a good idea to send a black and white photograph as well.
Black and white photos help show the value of the patient’s tooth in relation to the shade guide.
Case Fabrication
Once the scans and Dr. Christie’s prescription were received, the lab began the fabrication process. This case was done using a digital workflow and was digitally designed using the data from the patient’s try-in. The case was designed with a more round and softened look as per the patient and doctor’s direction.
It was determined that E.max would be an excellent material choice for this case. The patient had a nice underlying color and wanted a more natural result.
Some of the benefits of using E.max include the following:
After pressing the units, the case was fitted to the digitally designed and processed models and glazed to the final shade selection.
The case was then sent through the control process by the Smiles By Design team at Burbank Dental Lab, where the following was evaluated:
Once the case was deemed ready, it was sent out for insertion.
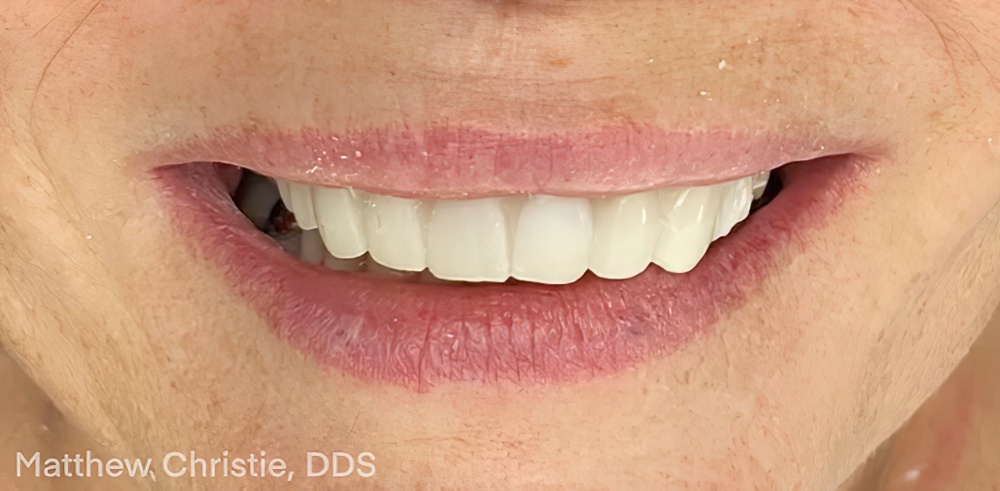
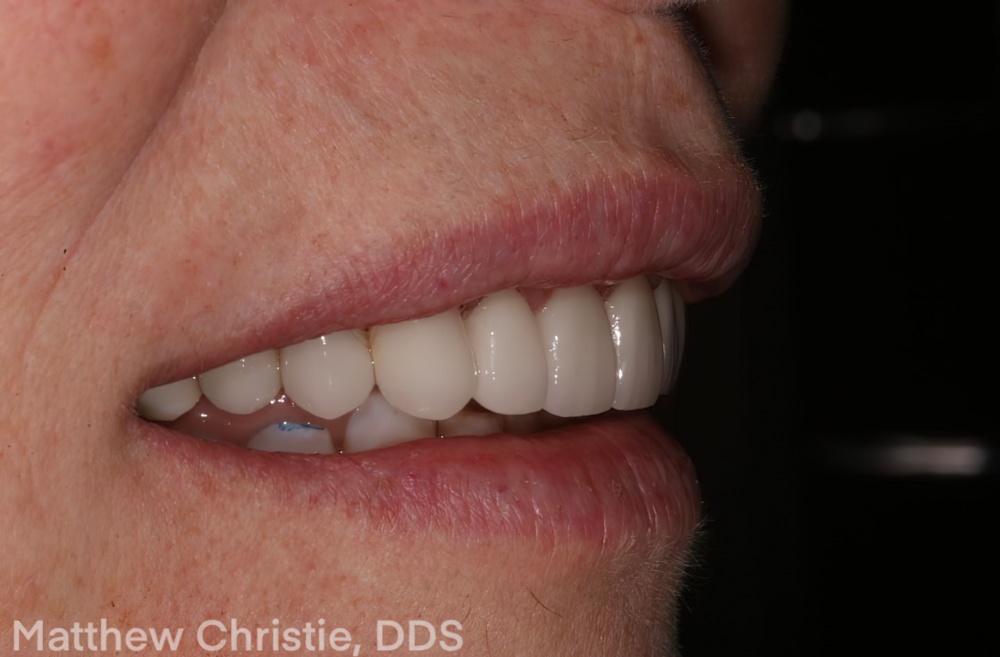
Final Results
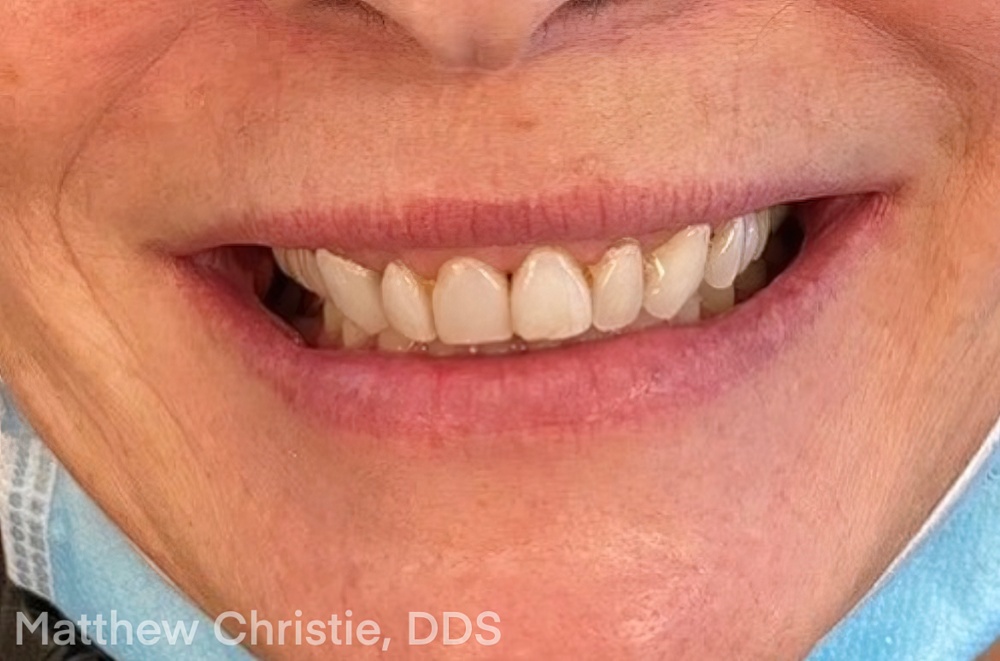
The E.max restorations were inserted and finalized and the end result is a beautiful and natural improvement over her previous veneers. Her smile is more youthful, brighter, and balanced. The patient was extremely happy with the results, and patient satisfaction is the best measure of a successful case.

Proper communication is key to excellent case results. Providing the necessary photos, shade information, and patient desires, equips the lab with the needed information to make the dentist’s case parameters a reality.
Burbank Dental Lab would like to thank Dr. Matthew Christie for allowing us to work on this case and for providing the photos and notes for this case study.
Please call Burbank Dental Lab’s Smiles by Design team for your next cosmetic case.
Thank you Dr. Matthew Christie
DR. MATTHEW CHRISTIE, DDS
We want to thank Dr. Matthew Christie for choosing Burbank Dental Lab to work with on this case.