


The maxillary central incisor is one of the most difficult indirect restorations to fabricate. Several factors affect the final results of any restoration, but the single central offers unique challenges even for the most experienced technicians.
The biggest challenge stems from the technician needing to match the surrounding dentition. In the case of centrals, it is the close proximity to one another that creates the challenge.
When matching any other teeth in the maxillary anterior, the teeth are evaluated within the surrounding dentition and by matching the contralateral tooth. The single central match entails more critical evaluation in terms of color, shape, texture, and translucency.
Challenges with Matching Central Incisors
After restoring thousands of single centrals, Burbank Dental Lab clearly understands what is needed to make these types of cases successfully.
Managing patient expectations will go far in making this process an exceptional one. Any dentist who has restored a central should understand that in most cases, it will take more than one attempt to make a restoration that will meet the esthetic requirements that result in a successful match. This understanding needs to be communicated to the patient to know what to expect in this process.
A few things contribute to the difficulty in matching a central incisor.
There are ways to help make the matching process more predictable.
Shade Communication
One of the most critical factors in matching a single central incisor is to accurately choose the initial shade. Understanding the nuances of the natural tooth shades and characteristics is essential when effectively selecting a shade.
The information then must be communicated with the lab for an indirect restoration to blend well with the natural tooth.
The following are some steps to take a shade effectively:

Case Study
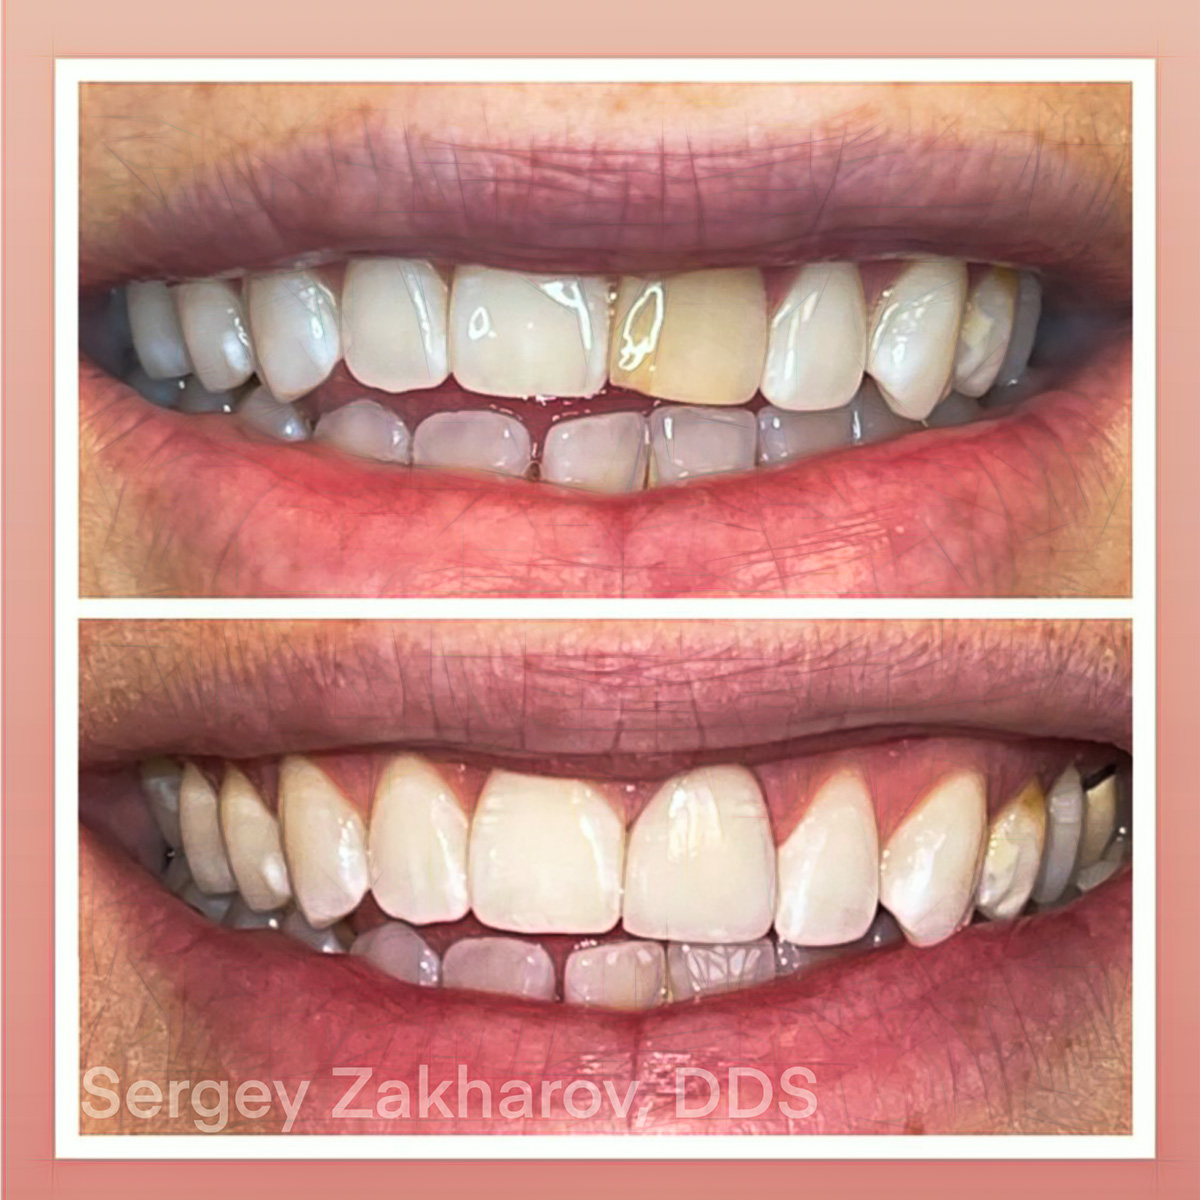
The following case was sent to Burbank Dental Lab by Dr. Sergey Zakharov of Family Dentistry at Riverside Crossing to help correct a discolored tooth #9.
This central incisor was treated with endo approximately 20 years before the patient coming in. According to the patient, the tooth became discolored and internal bleaching was ineffective in creating a more blended match to tooth #8.
To communicate the tooth’s color, Dr. Zakharov sent in a variety of high-quality photos. (see images below). This was essential in helping to create an indirect restoration that would blend well within the patient’s mouth.
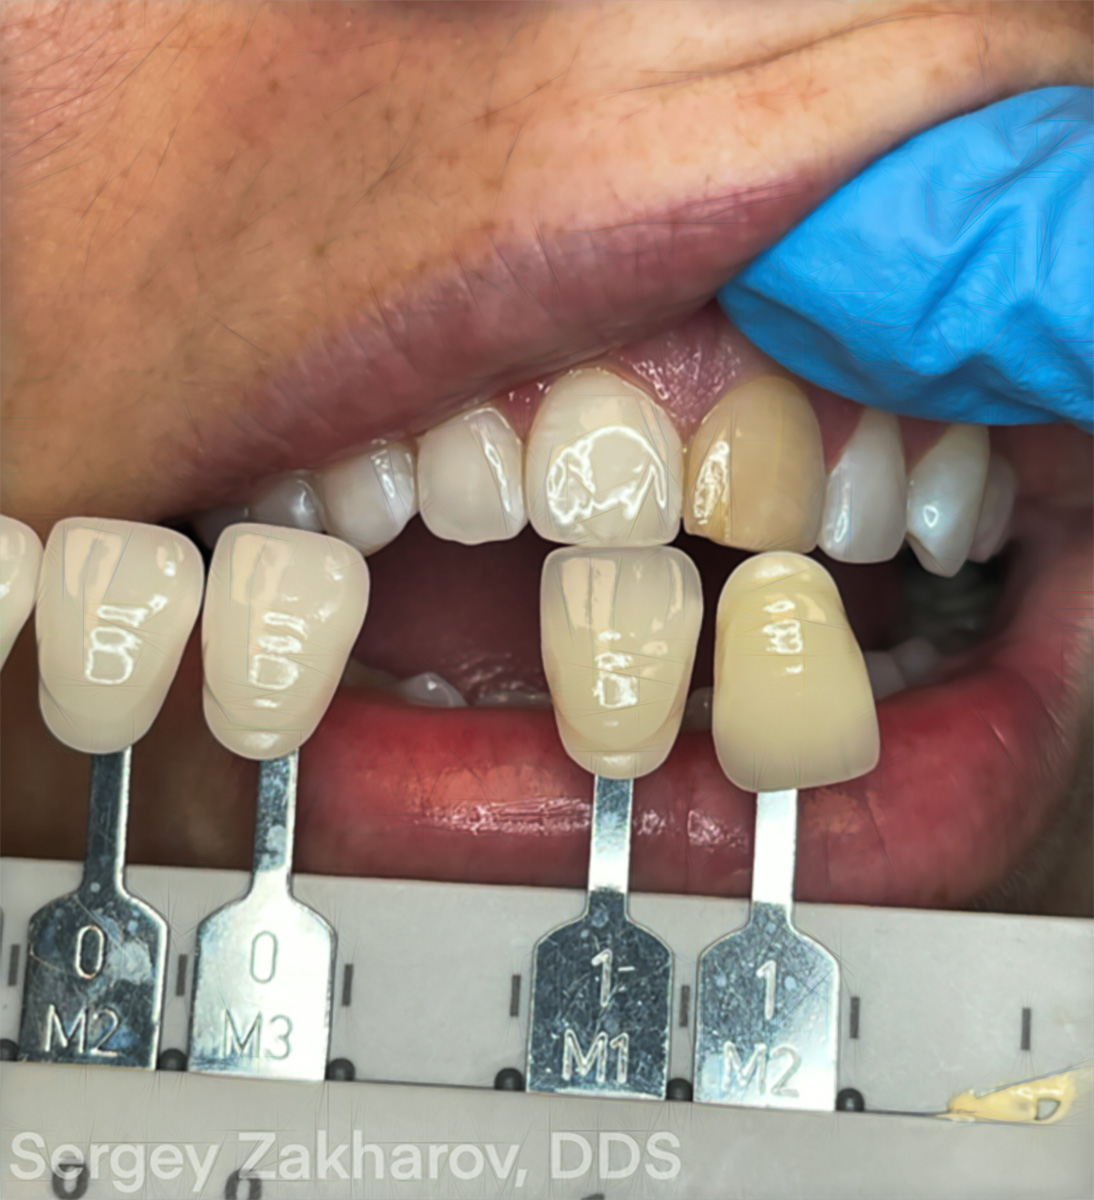
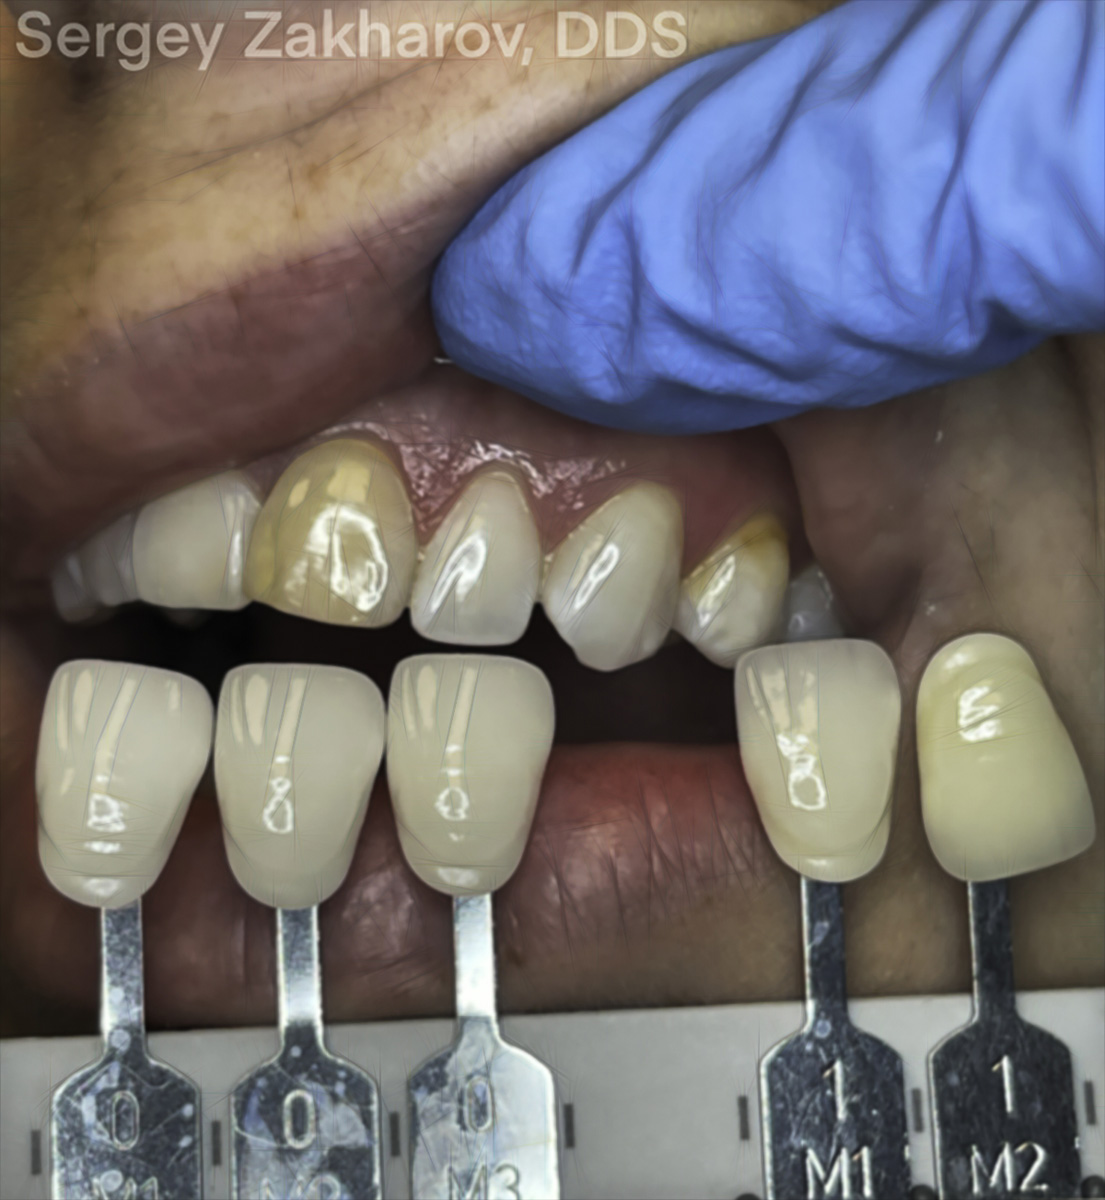
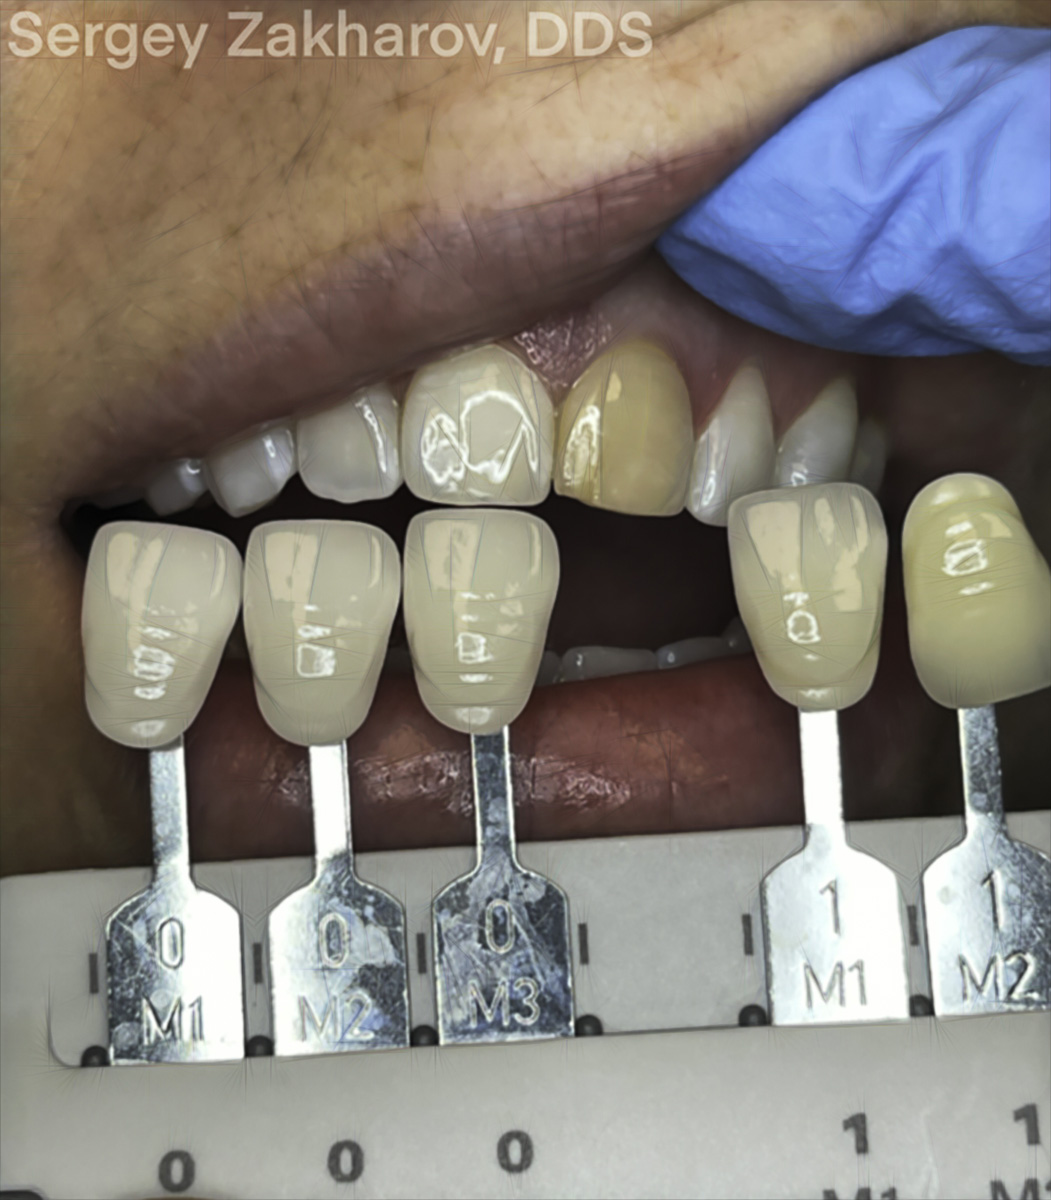
A Vita 3D shade guide was used to choose the shade. It is a good idea to hold up several shade tabs as it helps the technician to see the color in relation to the other closely related colors (see image below). Shade OM3 was chosen for this case. Dr. Zakharov also communicated that the prepared tooth was a 2m2.
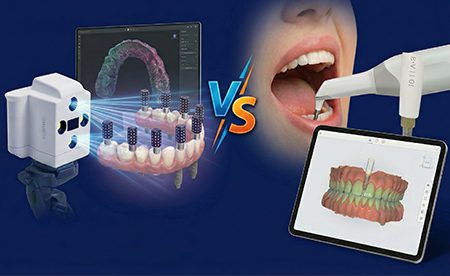
This case was then digitally impressed, and the scans were sent over to Burbank Dental Lab along with the shade information and photos.
A working model was then printed.
A stump die was also fabricated in the shade 2m2 to give a similar working background as the natural tooth.
It was determined that this case would have great results with an e.max layered restoration necessary to match tooth #8.
An e.max restoration was then designed using digital design software (CAD). This restoration was designed with a cutback on the facial to allow for porcelain layering to achieve the final end result.
The crown was then milled and checked for margin integrity. Using the photographs, the final layering process was done to achieve the desired OM3 color, shape, and contours.
Try-In
Burbank Dental Lab always recommends trying in a restoration before final cementation. This is because the final result is not only determined by the ceramic restoration itself but by a combination of things, including the underlying tooth color, the cement, and thicknesses. Therefore using a try-in paste that represents the final cement is a great way to evaluate prior to final insertion.
The try-in paste needs to represent the same color, opacity, and value. Using glycerin or water when trying in a restoration does not produce the same effects as resin cement.
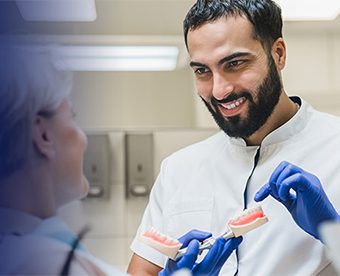
Dr. Zakharov tried in the crown and cemented the case with a translucent Calibra resin cement. The patient was happy with the improvement in their smile.
Thanks to the excellent communication from Dr. Zakharov and the skill of Burbank Dental Labs’ ceramic team, this case was completed in one try.
Understanding the difficulties associated with matching a single central incisor is key to creating cases that bring favorable results. These difficulties can be hard for patients to understand but managing their expectations is key to ensuring that they find the experience satisfactory.
Some cases will take several tries, and in some cases, the results can be achieved quickly. Communication is the key to getting as close as possible as quickly as possible.
Contact Burbank Dental Lab to find out more about us and how we can help you.


