Save 2 to 3 Appointments on Your Full Arch Implant Prosthetic Workflow

mm Written by Andrew Sedler

REQUEST FEE SCHEDULE

DOWNLOAD RX FORM

SCHEDULE A PICK-UP

COMING SOON

Authors: David French and Vincent Nalbandian

Full Arch Implant Prosthetic Workflow

In previous articles, we have discussed workflows for implant-supported edentulous cases. In this article, I have enlisted the expertise of Vincent Nalbandian to highlight a procedure that can potentially save 2 to 3 appointments in the whole process of completing an implant hybrid restoration.

The segment of the workflow that will be discussed in this article is the portion of the process that occurs post implant surgery after the tissue heals. This assumes that a conversion denture is delivered at surgical appoint.

What You Will Learn In This Article

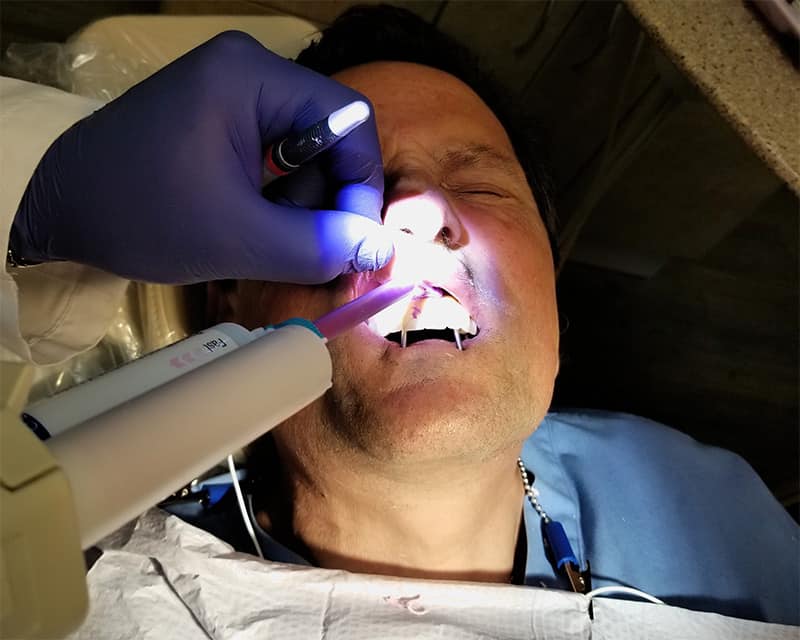
  • Capture required patient records.
  • Multiple appointments that can be combined into one.
  • Steps for the first post-operative appointment.
  • Get new laminated Success Guide for Implant-Supported Edentulous Cases and the Burbank Blueprint Appointment.

The specific step in the workflow will involve procedures that can be used to capture required patient records in one appointment that usually would take three (3) appointments.

Following this procedure, you will capture the following patient records:

  • 1

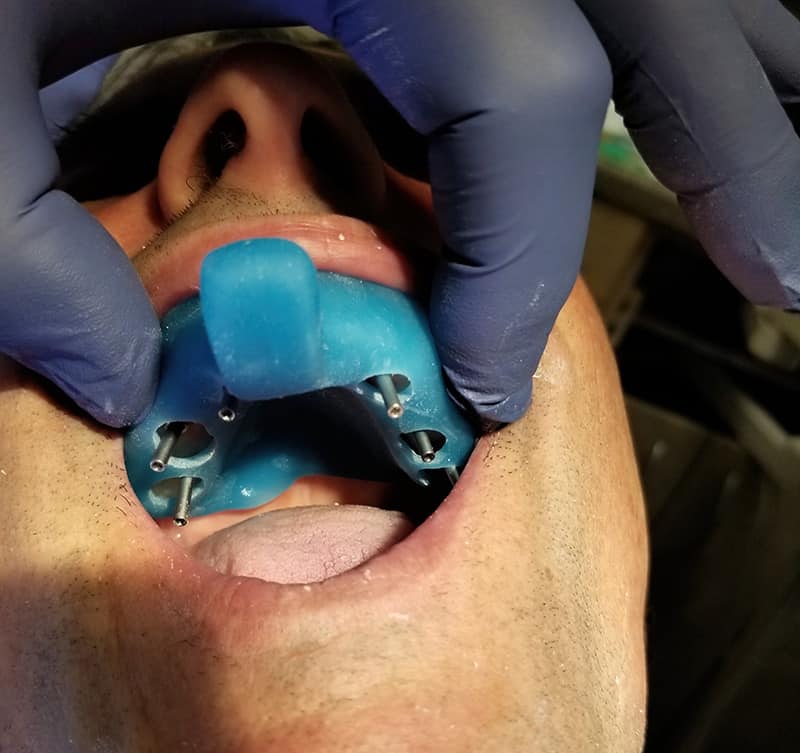
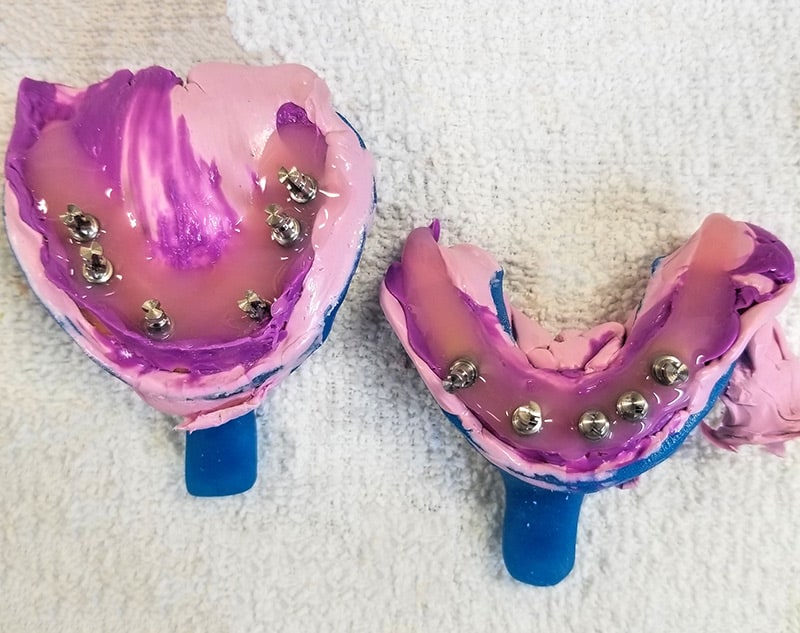
    The implant level impression
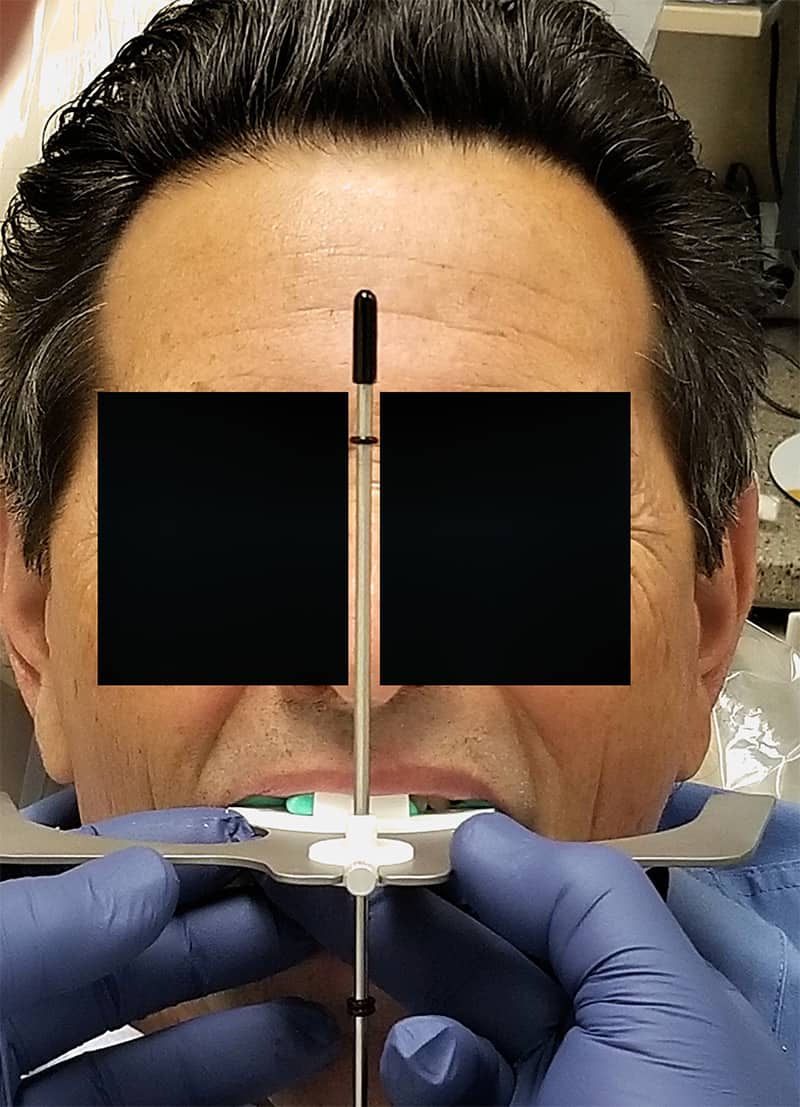
  • 2

    Midline

  • 3

    Vertical

  • 4

    Occlusal relationship

  • 5

    TMJ condyle relationship to the incisal edge

  • 6

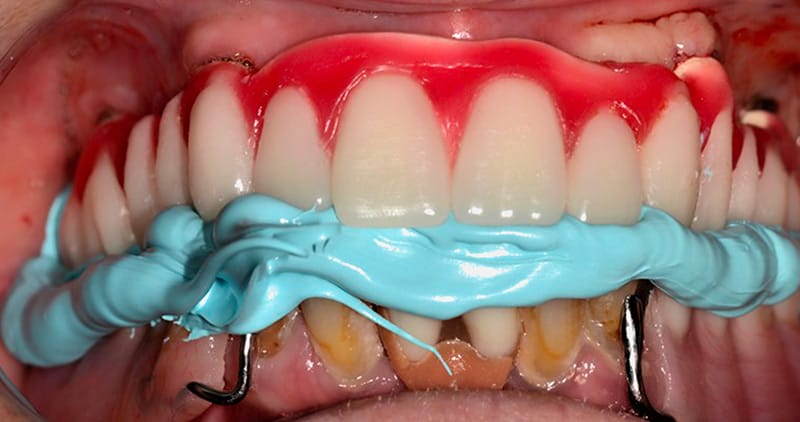
    Accurate tissue impression

  • 7

    Shimbashi of conversion denture

  • 8

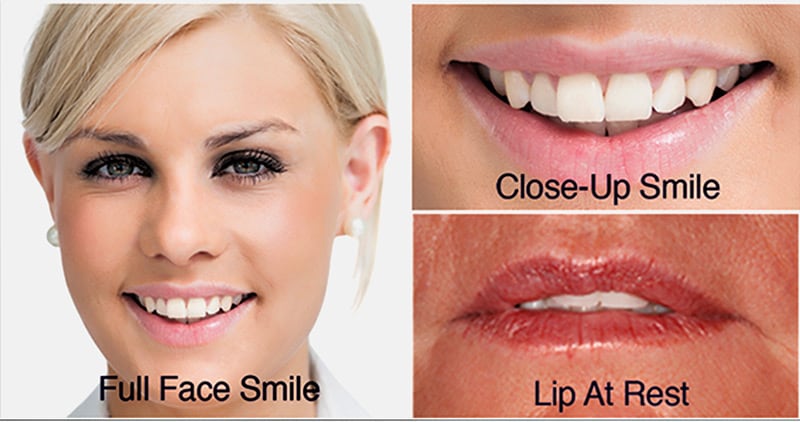
    Photographic records of smile and lip at rest/repose smile

Done correctly and with accuracy, the records taken at this appointment will combine the following appointments into one appointment:

  • The initial impression appointment
  • Bite block & verification jig appointment
  • Wax set-up try-in appointment

It is conceivable that you could go straight to a finished prosthetic; however, we would advise that a PMMA provisional be placed prior to the final prosthetic.

It is important to note that this process will require an experienced technician or trained auxiliary are advisable to efficiently execute these procedures.

We call the following processes for the post-surgery implant level impression appointment The Burbank Blueprint for Implant Prosthetics.

Steps for the First Post-Operative Appointment

  • Using the conversion denture(s) that was placed at the surgery appointment, take a bite registration. (Figure 1)

Take postoperative bite registration

U'sing a Lois Facial Analyzer Facebow

  • The Kois Dento-Facial Analyzer is an elegantly simple instrument. Unlike other facebows, there is no ear bow, movable joints, or tightening screws.
  • The Kois Bow uniquely captures the condyle relationship -100-mm distance of the conditional hinge position.
  • Facial midline
  • Full face smile (forehead to chin), lip at rest close-up, smile close-up
  • Incisal shade picture (shade tabs(s) incisal edge to incisal edge on the same vertical plane.)
  • Over-all shade picture (shade tab next to target shade tooth, oriented body-body, incisal to incisal)   (Figure 3)

Over-all shade picture

Figure 3

  • Be sure to thoroughly inject impression material under conversion denture to capture current tissue impression. You may also remove the prosthetic, syringe PVS directly onto tissue, screw the conversion denture down and then take the pick-up impression. (Figures 4 & 5)


Pick-up impression

Figure 4


Pick-up impression

Figure 5

  • Attach analogs to the base of the conversion denture.
  • Pour soft tissue model into impression prior to stone. (Figure 6)


    Pour soft tissue model into impression

    Figure 6

  • Pour a stone model into the pick-up impression. (Figure 7)

    Pour a stone model

    Figure 7

  • Articulate upper model first using the Kois Bow mounting plate. (Figure 8)
    Articulate model first using the Kois Bow mouting plate

    Figure 8

  • Mount lower to conversion denture to the upper using bite. (Figure 9)
    Mount lower to conversion denture

    Figure 9

  • Record vertical of the conversion denture on the articulator. pin setting.

Return conversion denture to the patient.

Figure 10

  • The lab will create a new ideal set-up based on the vertical and occlusal relationship from the records taken. The set-up will be in harmony with the impression of conversion denture and incorporate any changes in smile display or VDO that were expressed at impression appointment. The lab will then fabricate a PMMA for delivery at the next appointment.  (Figure 11)

Send articulated model to the lab.

Burbank Dental Lab is developing a new laminated success guide for implant supported edentulous cases. The new guide will include the Burbank Blueprint Appointment discussed in this article. It will be available on November 30th. Request now to order this free tool from Burbank Dental Lab.

Burbank Dental Lab
Burbank Dental Lab Laminated Success Guide

REQUEST YOUR FREE IMPLANT SUCCESS GUIDE BELOW

Success Guides

We Appreciate You Sharing This Product

SHARE X LinkedIn
Previous Post:

NEED HELP CHOOSING THE PERFECT PRODUCT?

Would you like to speak with an expert now?

SPEAK TO TECHNICAL SUPPORT

Would you like to schedule a call?

SCHEDULE A CALL

Speak to Technical Support

Call us at

(800) 336-3035

Schedule A Call

Slide 1

Fabrication
of the future
is here!

Burbank Dental Lab has three new state-of-the-art Carbon M2 printers. We are very excited about the options that these cutting-edge printers will allow us to offer our dental clients. Here are some of the advantages that these printers will begin to deliver to you and your dental practice.

Our New
State-Of-The-Art
3d Printers

Carbon offers a highly dependable 3D manufacturing solution for many dental applications with its breakthrough Digital Light Synthesis™ technology, enabled by a wide range of dental materials.

a new baseline
for innovation
in fabrication.

Burbank Dental Lab has the next generation of Carbon DLS™. Meet our new Carbon M3 and M3 Max printers. These advanced printers enhance fabrication possibilities using Digital Light Synthesis™ technology, enabling us to provide quality and innovation for our clients.

Carbon M3 Printer - Burbank Dental Lab - CA

Meet Our New
next generation of carbon DLS™
M3 Max Printers

The M3 printer is the cutting edge of DLS printing with a true 4K light engine. We save time and improve quality with Automated Print Ppreparation which ensures high-quality assurance and results.