The Traditional Workflow for Edentulous Implant Cases

mm Written by Andrew Sedler

The Traditional Workflow for Edentulous Implant Cases

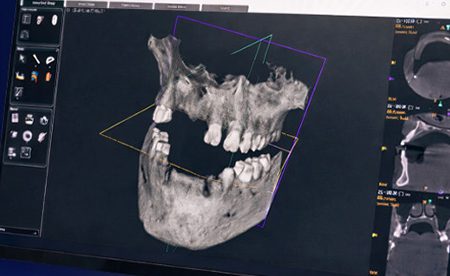
I recently presented the digital workflow for edentulous implant restorations. In this article, I will provide an easy to follow step-by-step workflow for an edentulous implant case, within a TRADITIONAL workflow.

What You Will Learn In This Article

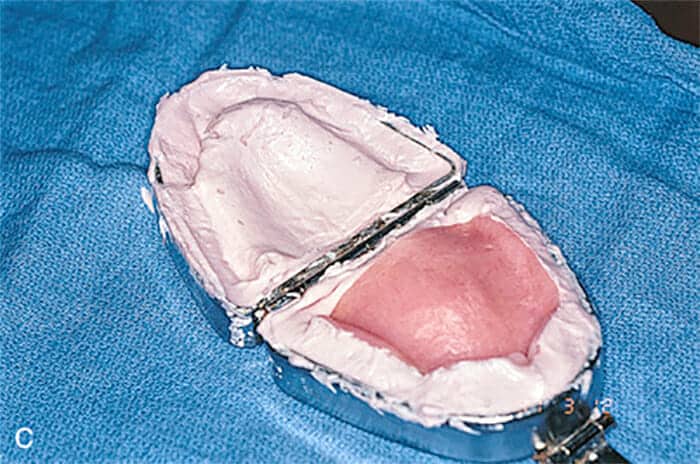
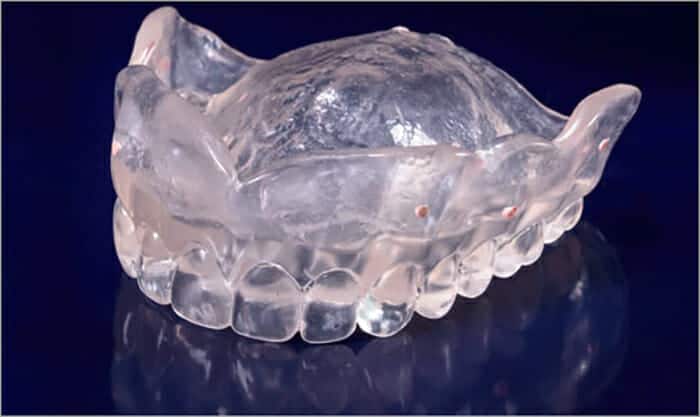
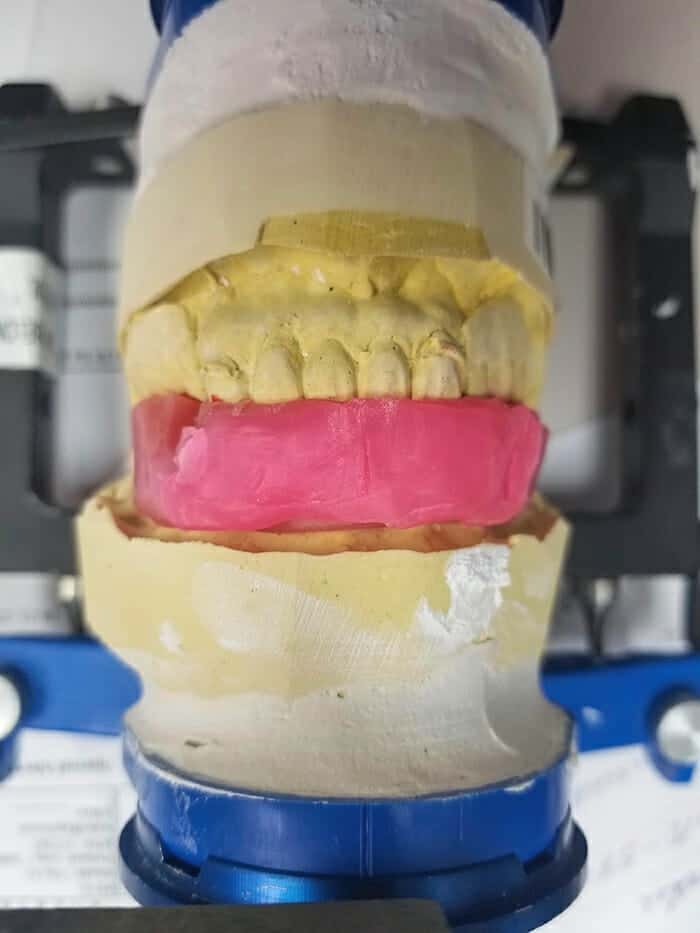
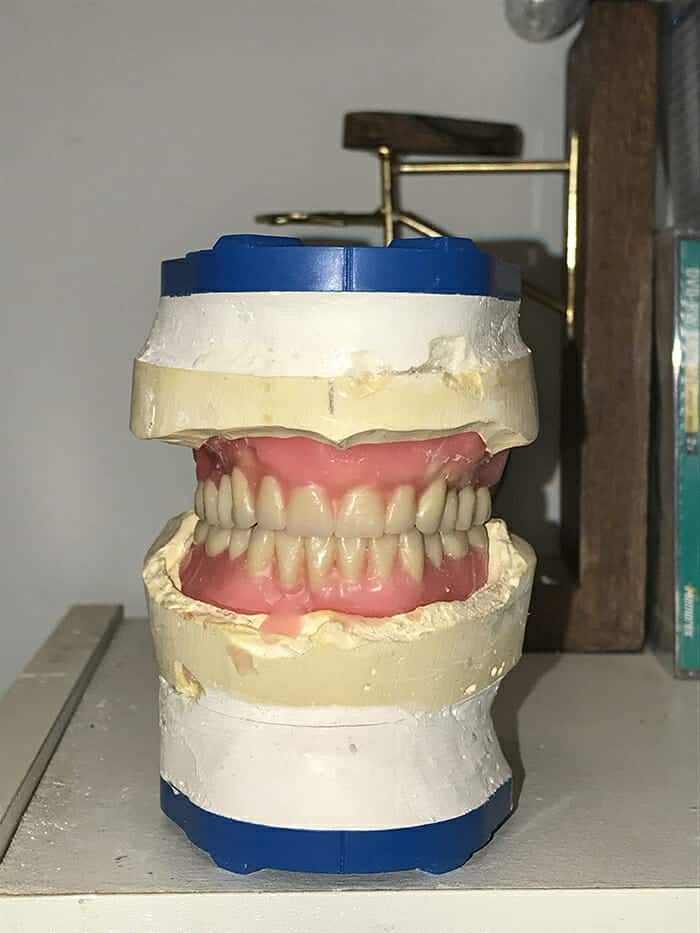
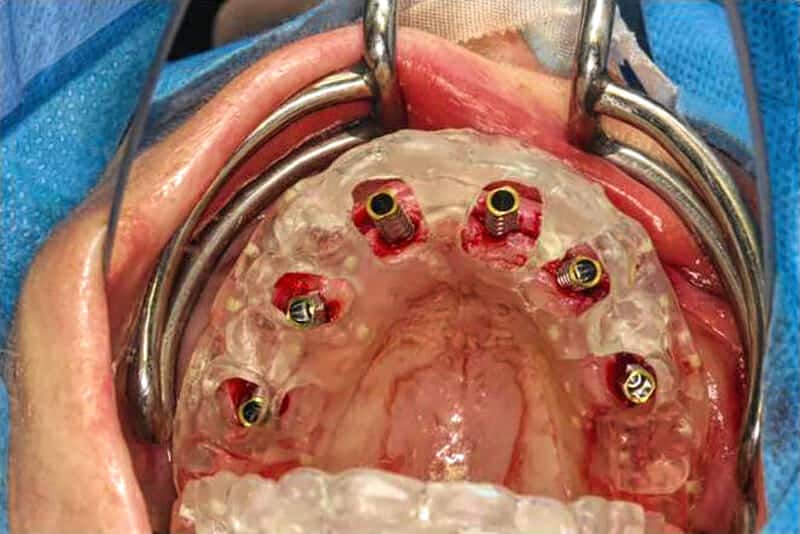
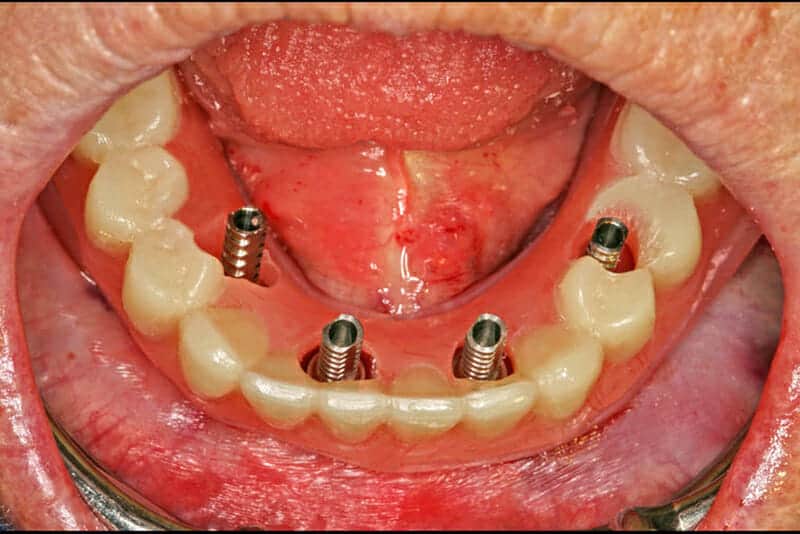
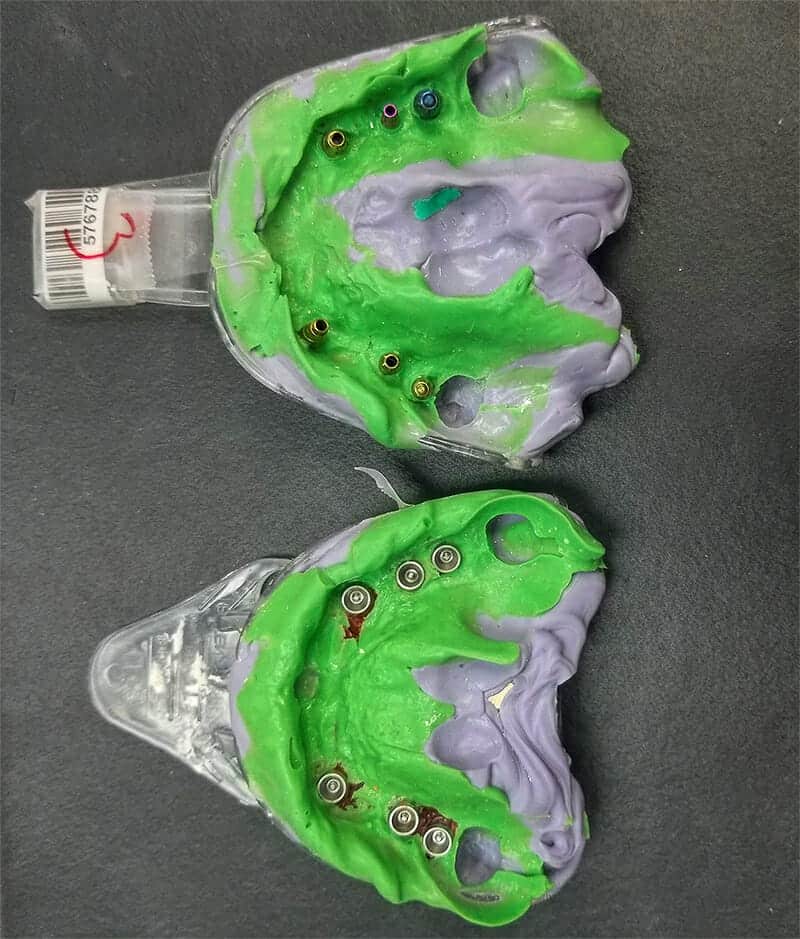
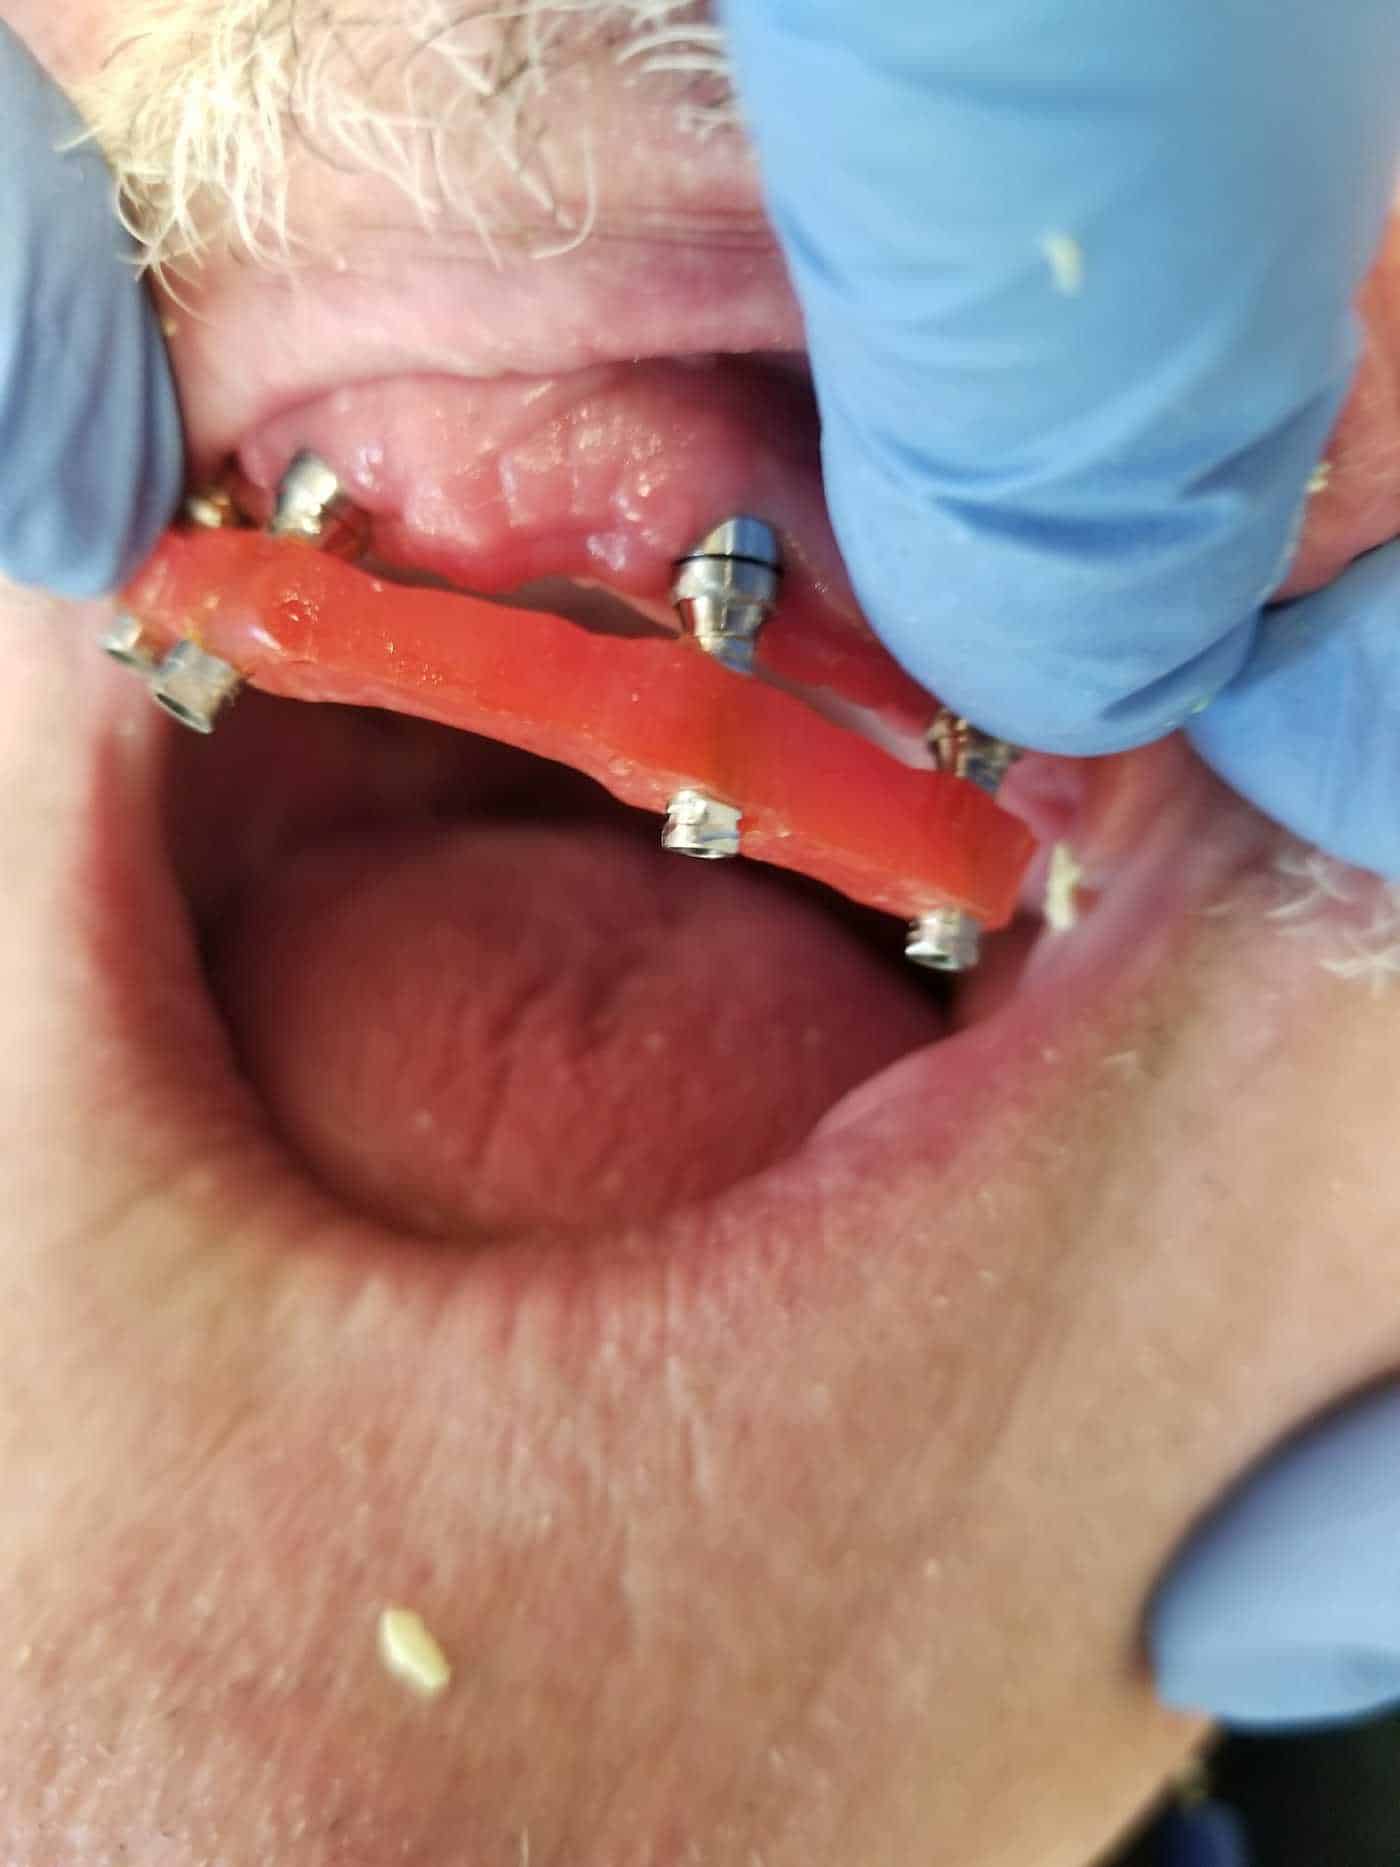
  • Step-by-step workflow for edentulous implant case, within a TRADITIONAL workflow.
  • Free Offer: Laminated Side-By-Side Edentulous Implant Restoration - Digital Compared To Traditional

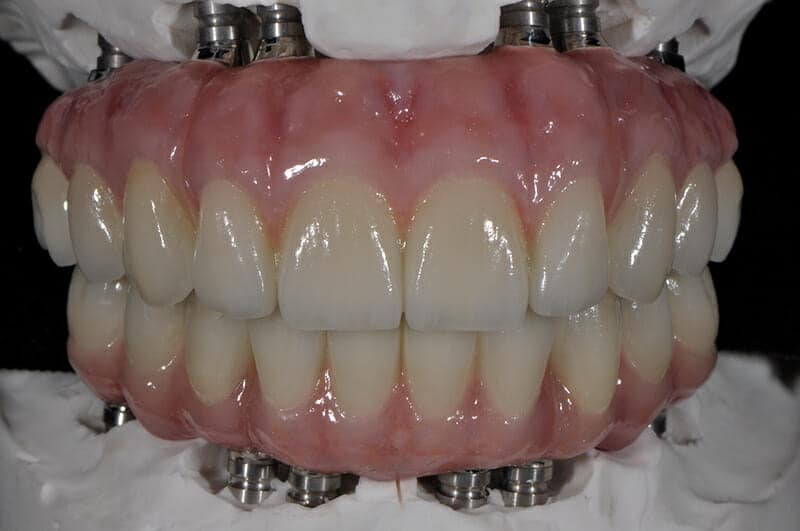
Traditional Workflow Procedures for Edentulous Implant Cases

The initial steps in a digital workflow for an edentulous case are essentially the same as a traditional workflow. There are two possible starting places for any given edentulous implant case. In either situation, the goal of the initial sequence of records is to establish the desired vertical, smile line, tooth position, occlusion, and phonetics.

Duplicate of Current Denture

  •  If the current denture meets the essential elements that you will desire in the final prosthetic you can make a duplicate denture that will be used for articulation and as the surgical stent.

Make a duplicate denture - Figure 1

Figure 1

Duplicate of Current Denture Step

Figure 2

New Denture Set-Up

  • Requires bite block and set-up try-ins.

New denture set-up

Figure 3

New denture set-up - Figure 4

Figure 4

In both cases, it is important to take a PVS reline impression in the duplicate denture or new denture set-up.

  • Once an ideal denture set-up is established it is then used as the basis for a Surgical Stent. 

Fabricate a surgical stent

Figure 5

  • You can also use the ideal denture set-up to fabricate a new denture that has guide holes that are used in surgery as a guide to begin the initial osteotomy pilot hole. 
  • Use the surgical stent as a guide to initiate pilot hole osteotomy, then complete the osteotomy freehand.

Surgical Appointment

Figure 6

  • A conversion denture can be pre-fabricated by using the ideal denture set-up used to fabricate the surgical stent. 
  • The conversion appliance can be derived from previous denture or a new denture. (The new denture would be conventionally processed from a new set-up.)
  • The titanium cylinders are seated, and then the prosthetic is placed over the top and tacked down. The prosthetic is removed and perfected for delivery during the surgical appointment.

Titanium cylinders are seated

Figure 7

  1. Take a bite with the conversion denture in place. 
  2. Pick-up impression of conversion denture, using an open tray technique. (Figure 8)
  3. Be sure to thoroughly inject impression material under conversion denture to capture current tissue impression. You may also remove the prosthetic, syringe PVS directly onto tissue, screw the conversion denture down and then take the pick-up impression. 
  4. Remove the pick-up impression and attach analogs to the base of the conversion denture and pour a stone model. 
  5. Carefully remove conversion denture from the impression, and articulate model and conversion denture to opposing using bite. 
  6. Record vertical of the conversion denture on an articulator.
  7. Return conversion denture to the patient. 
  8. Send articulated model to the lab. 
  9. Lab fabricates a wax set-up up for use fabricating the final restoration. 

Open tray technique

Figure 8

Set-up try-in and verification jig try-in

Figure 9b

Set-up try-in and verification jig try-in

Figure 9a

  • Using the wax set-up the lab will fabricate PMMA provisional or the final restoration.

PMMA provisional

Figure 10

Final restorations can be fabricated from a scan and copy mill of the tested and approved provisional and can be delivered in a variety of materials for the final restoration. 

  1. Full arch monolithic zirconia. (Figure 11)
    Full arch monolithic zirconia - fig. 11

    Figure 11

  2. Monolithic composite bonded to a milled Co/Cr substructure. (Burbank Dental Lab’s SmartComposite Hybrid) (Figure 12)
    SmartHybrid Composite

    Figure 12

  3. Acrylic and denture teeth cured to a metal substructure.  (Figure 13)
    Acrylic and denture teeth cured to a metal structure

    Figure 13

  4. Porcelain fused to metal hybrid type or C & B type restoration. (Figure 14)
    PFM Hybrid

    Figure 14

Burbank Dental Lab
Burbank Dental Lab Implant Success Guide

REQUEST YOUR FREE IMPLANT SUCCESS GUIDE TODAY

Burbank Dental Lab

Did you like this article?

Let us know by giving us a clap!

Top 10 Most Clapped Articles

Resource Center

Products

Slide 1

Fabrication
of the future
is here!

Burbank Dental Lab has three new state-of-the-art Carbon M2 printers. We are very excited about the options that these cutting-edge printers will allow us to offer our dental clients. Here are some of the advantages that these printers will begin to deliver to you and your dental practice.

Our New
State-Of-The-Art
3d Printers

Carbon offers a highly dependable 3D manufacturing solution for many dental applications with its breakthrough Digital Light Synthesis™ technology, enabled by a wide range of dental materials.