


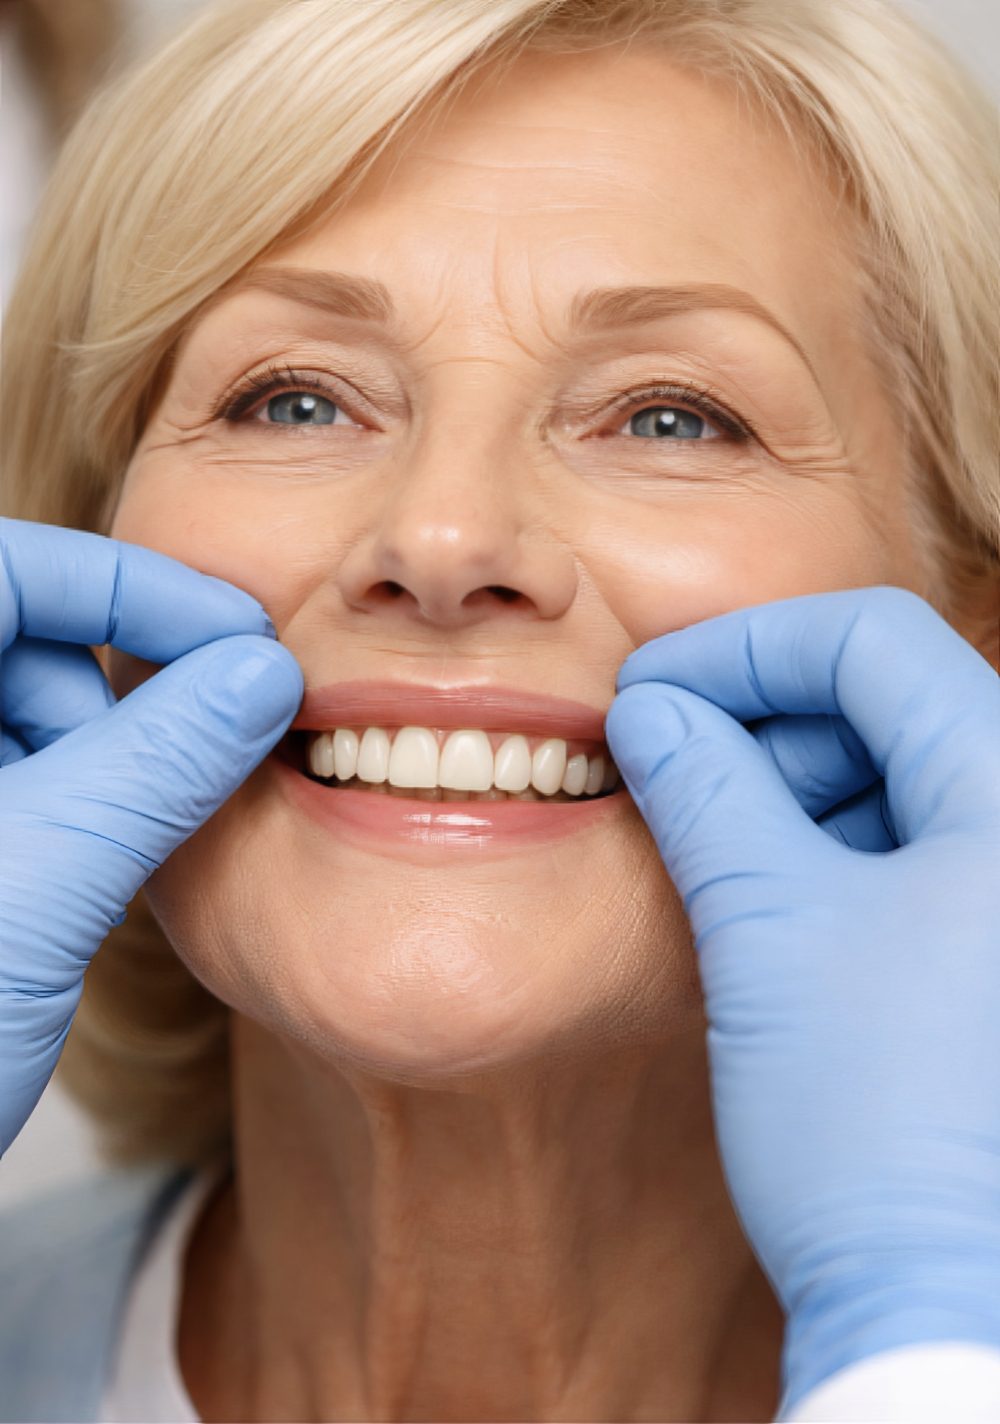
Lip support should be tested, not assumed.
Edentulous Full-Arch Implant Treatment Planning
This guide is written for edentulous full-arch treatment planning, specifically the decision-making that separates predictable cases from “fixed vs removable” debates that stall progress. The goal is to make the fixed vs removable decision restoratively driven: define tooth position and facial support needs, quantify restorative space, evaluate smile line/transition-zone visibility, then align implant planning to what the final prosthesis must do.
Key Takeaways
Restorative space problems are hard to correct after implants are placed. Measure early.
Definition: Restoratively driven evaluation for edentulous full-arch prostheses
A restoratively driven evaluation starts with the planned tooth position and facial esthetic requirements, then uses diagnostic records to determine which prosthesis category can deliver those outcomes without design compromises. In edentulous full-arch cases, the decision most often turns on (1) whether tissue replacement is required for lip support, (2) available restorative space, and (3) whether the prosthesis–tissue transition will show in the smile. A short diagnostic sequence, bite blocks, a diagnostic tooth setup/try-in, photos, and, when available, CBCT-based planning make those constraints measurable before surgery.


Dr. Michael Boktour, DDS
“High-quality dental lab. Great customer care and communication.”

A wax try-in isn’t optional esthetics —
it is your simplest validation tool
before surgery.
The three questions that decide most edentulous full-arch cases
If you document these three answers early, the rest of the planning becomes clear. To do this, evaluate the following:
1. Facial esthetics and lip support
Edentulous bone loss often changes the structures that previously supported the upper lip and peri-oral tissues. The practical planning question is whether the final restoration must replace missing tissue volume to maintain facial support and esthetics. If the patient’s lip support depends on flange volume during the diagnostic setup, that finding should drive the restoration category selection.
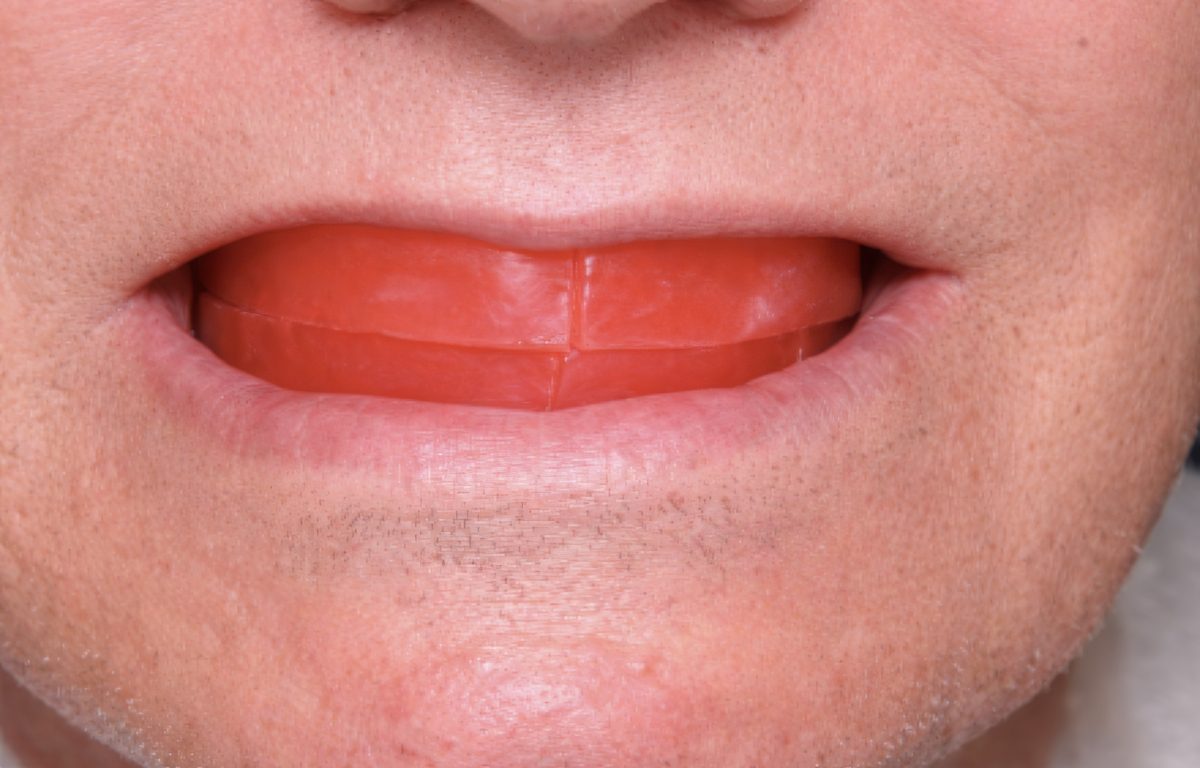
The flange-dependence test (recordable, repeatable)
This is one of the fastest ways to convert “I want fixed teeth” into an objective constraint.
The fixed vs. removable decision
shouldn’t be driven by patient preference. It should be driven by biology.
2. Smile line, tissue display, and transition-zone visibility
The transition zone is the junction between the prosthesis and natural soft tissue. If this junction falls within the patient’s smile display, esthetic risk increases because a visible interface can be difficult to disguise in function — especially in higher-smile patients.
Clinical implication: If the transition zone is likely to show, removable designs that incorporate controlled tissue replacement can provide a more forgiving esthetic solution than designs that leave a visible junction.
3. Restorative space
Restorative space is one of the most decisive constraints in the planning of full-arch edentulous implants. The failure mode is predictable: insufficient space forces thinning, compromises contours, complicates access, and reduces design tolerance. These are all problems that are hard to correct after implants are placed.
Use a consistent measurement reference point
When discussing restorative space, it is important to note that it is highly dependent on the reference point used (for example, ridge/soft tissue crest to occlusal plane vs implant platform to prosthesis outer surface). The fix is simple: document which reference point you’re using and keep it consistent across the case.
Insufficient restorative space doesn’t announce itself at delivery.
It announces itself at surgery.
FREE TO DOWNLOAD – SUCCESS GUIDES


DOWNLOAD A GUIDE
A modern diagnostic workflow
The steps below preserve the same clinical decision points, revealing how records are captured and validated.
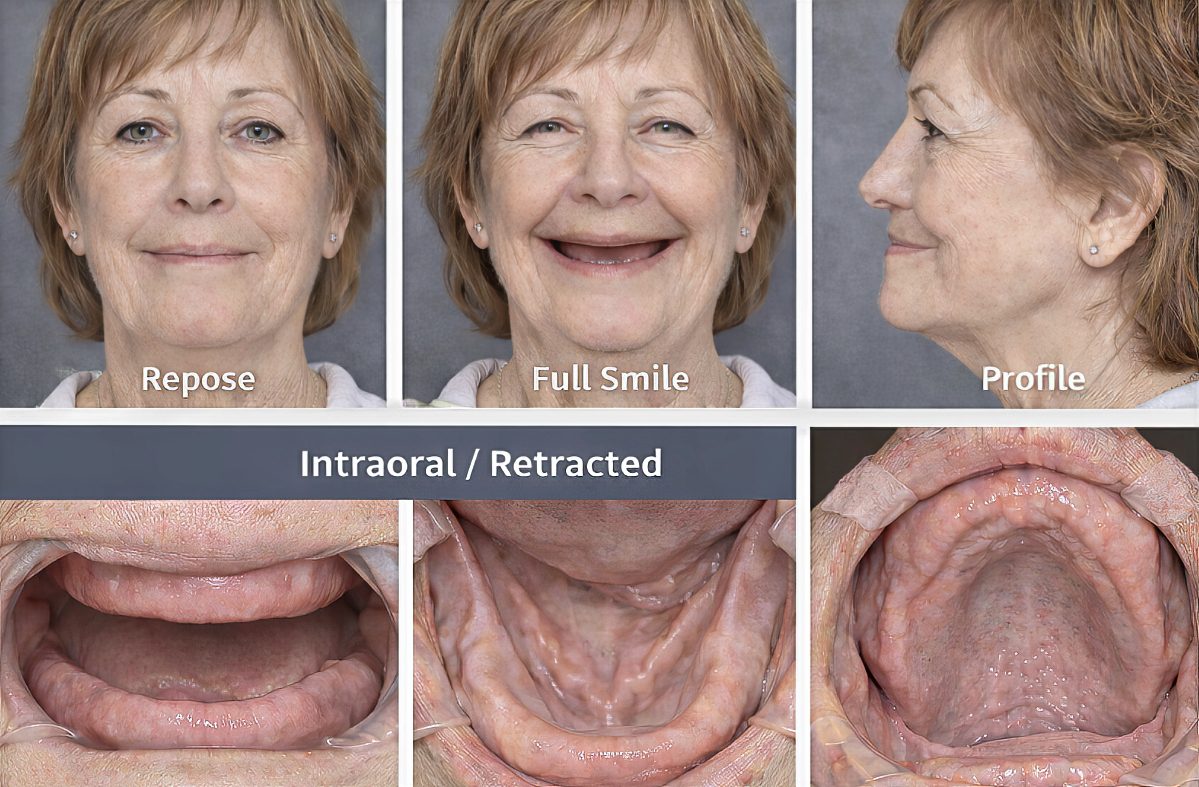
Step A: Establish the esthetic envelope with bite blocks and a diagnostic set-up
Step B: Capture photos that answer planning questions
Capture at minimum: repose, full smile, profile, and any intraoral/retracted views that document ridge form and tissue display. These photos become the “ground truth” for smile line and lip support documentation.
When the transition zone shows in the smile, the design conversation
changes entirely.
Step C: Quantify restorative space early
Measure space on the diagnostic set-up with calipers and/or within CBCT planning software when applicable. For overdenture and attachment planning, contemporary clinical guidance emphasizes verifying restorative space during diagnosis, not after surgery.
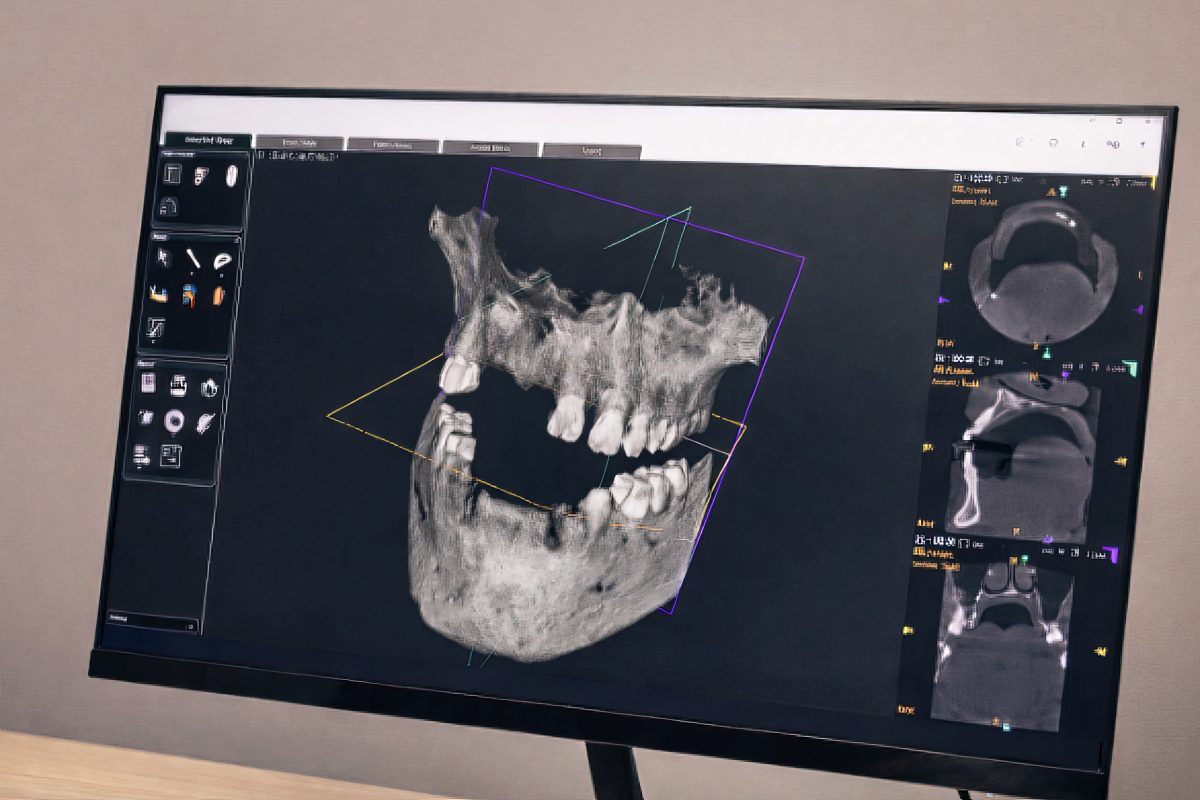
Step D: Use CBCT planning when available (and dual-scan logic when indicated)
CBCT-based planning helps visualize restorative space relative to the proposed occlusal plane and can support component visualization in software in many workflows.
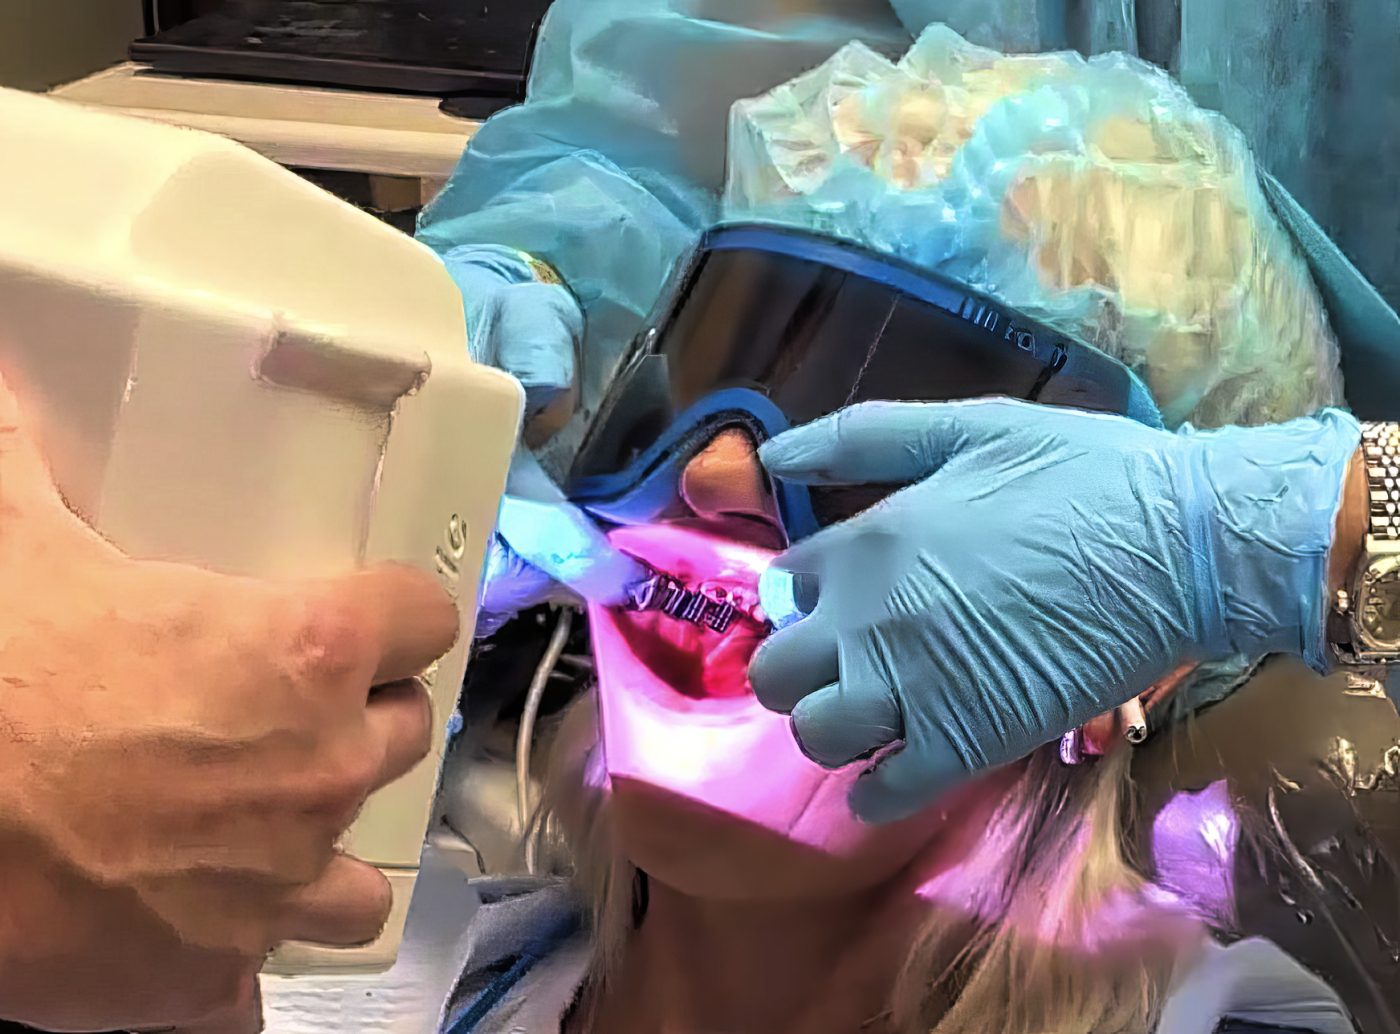
Step E: For complex full-arch cases, consider implant position capture workflows
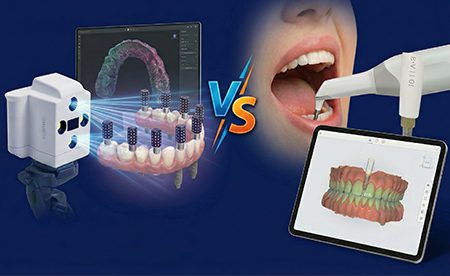
When the workflow requires highly consistent implant position capture across multiple implants, photogrammetry-style workflows capture implant positions and then separately capture soft tissue for alignment into a high-precision model. This sequencing using the Imetric 4D scanning service includes implant position capture, then soft tissue scan, then alignment.
Clinical decision logic: mapping findings to prosthesis category
This is the chairside logic that aligns the team.
Step 1: Decide whether tissue replacement is required
Step 3: Validate space using published minimums/ranges
Use published thresholds as guardrails. They are not “one-size rules,” and they depend on the measurement reference point and prosthesis design, so document your reference point and compare like-to-like.
Step 4: Select the category that best fits the documented constraints
The dental lab can’t protect you from a space problem it doesn’t know about.
Implant Prosthetic Dimensional Requirement Chart
Restoration category | Occlusal clearance (tissue to opposing) | Buccal/Lingual width | Wall thickness from screw hole |
PFM Hybrid | 7 mm | 8 mm | 2.5 mm |
Zirconia Hybrids | 8 mm | 10 mm | 3 mm |
SMART Composite Hybrid | 10 mm | 9 mm | 3 mm |
Conventional Hybrid | 11 mm | 9 mm | 3 mm |
Denture over Hader Bar | 11 mm | 11 mm | 4 mm |
Denture over Locator Bar | 12 mm | 11 mm | 4 mm |
Denture with Locator Direct to Implants | 10 mm | 10 mm | 3 mm |
What to send to your dental lab (modern edentulous implant planning checklist)
FAQ