Getting Started With Guided Surgery Planning For Edentulous Patients

mm Written by Andrew Sedler

Edentulous implant planning screenshot

Recently we have received an increasing number of questions about what dental records need to be collected for use with CBCT guided implant surgery planning for the edentulous patient. The same steps and records would apply in the preparation for guided implant surgery for any edentulous case, including the following treatment path-ways: “All-On-4®”, denture over locator bar, or for any screw retained hybrid denture prosthesis. The purpose of this article will be limited to the steps and clinical records needed prior to the CT scanning appointment and before the use of guided surgery planning software.

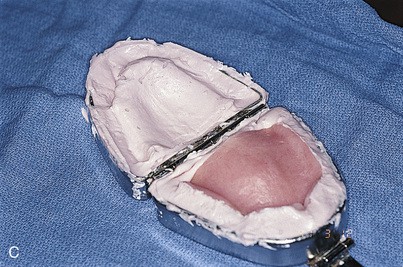
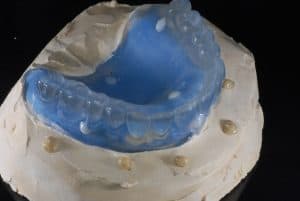
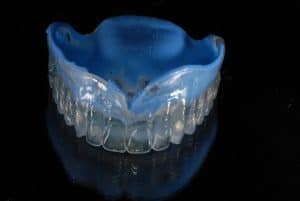
The first step regardless of what treatment plan you propose to finish with, is to establish an ideal functional and esthetic relationship. The only way to determine this is with a denture that establishes the prototype for what you will end with. This can be accomplished with the existing denture, but only if it is in an ideal relationship already.

SPECIAL OFFER

Guided surgery appliance from Burbank Dental Lab

Smart1 Surgical Guide First Case Offer - $50 Off

(Regular $150 Single, $200 Multiple, $375 Edentulous)

OFFER GOOD THROUGH MARCH 30, 2018
Day
Hour
Minute
Second

Smart1 Surgical Guide First Case Offer

6 Best Practices to Establish Accurate Stitching of All The Elements

  1. Begin with an “ideal” denture set-up. Teeth need to be in proper position functionally and esthetically. If the existing denture is not ideal, it is best to begin with a new interim denture. As this denture will be the foundational template for the implant-supported prosthetic to come, it is important that several factors be determined to be as ideal as possible. The following are elements to be evaluated for the most predictable results:
    .
    a. Ideal VDO, consideration of facial esthetics.
    .
    b. Esthetics - teeth positioned in the smile, and lip and facial support for esthetic results.
    .
    c. Function - creating an ideal functional relationship to avoid interferences.
    .
    d. Phonetics - evaluate the effect of tooth positioning that does not create phonetic issues.
    .
    e. Joint and muscle effects.
    .
    This step is critical in determining what type of prosthetic options will be possible and yield the best results. It also will accurately guide you in the planning of the positioning of the implants. It is advisable to allow the patient to live with this relationship for several weeks to ensure that it does not create issues, especially with TMJ and muscles.
  2. Once the ideal denture is established, an acrylic duplicate denture is made with a 10 - 12 % barium sulfate acrylic. This can be made using Lang’s denture duplication flask or with a plastic appliance case. This will be used as your CBCT scanning appliance. (Fig. 1)
    .Denture duplication flask
  3. Reline the scanning appliance with PVS. This is important as you need an accurate fit against the tissue for the CT scan. (Fig. 2)
    .
    Scanning appliance at Burbank Dental Lab.
  4. At this point pour the reline impression of the denture in lab stone. It is important to extend the stone base about 8 mm beyond the buccal surface of the denture.
    .
  5. Before separating the impression from the stone, add composite dots on the surface of the denture and the model base, about 2mm diameter 1 mm high, raised dots. These should be disbursed evenly over the surface denture and buccal periphery of the stone base, using about 6 dots on the stone base and 8 dots on the denture itself. These dots will be used to orient and stitch together the tissue surface model, and the denture to the CT scan in the planning software. (Fig. 3)
    .
    Burbank Dental Lab - Fig. 3.
  6. Perform an optical scan of the UNSEPARATED model and denture, then scan each separately after separation. The .stl files of these scans will be used to overlay these scans over the CBCT scan in the implant planning software.

These practices will give you the elements to establish a very accurate stitching of all the elements so that your surgical plan and guide design will provide you with the best results.

The YouTube video below by Dr. Cory Glenn “ Full Arch Case Planning with Blue Sky Plan”  was used as a reference for this article. I highly recommend watching the video below as well as checking out Dr. Cory Glenn’s seminars on all things guided surgery.

Did you like this article?

Let us know by giving us a clap!

Top 10 Most Clapped Articles

Resource Center

Products

Slide 1

Fabrication
of the future
is here!

Burbank Dental Lab has three new state-of-the-art Carbon M2 printers. We are very excited about the options that these cutting-edge printers will allow us to offer our dental clients. Here are some of the advantages that these printers will begin to deliver to you and your dental practice.

Our New
State-Of-The-Art
3d Printers

Carbon offers a highly dependable 3D manufacturing solution for many dental applications with its breakthrough Digital Light Synthesis™ technology, enabled by a wide range of dental materials.