Dentures
Digital Dentistry In Your Dental Practice
Dentures In Only 3 Appointments - Burbank Dental Lab
DENTURES IN ONLY 3 APPOINTMENTS

Written by Andrew Sedler

What does it mean when the term "digital denture" is used? There is not just one single answer to that question. The reality is that workflow for a “digital denture” is dependent on what records you gather at the first appointment. While the term that we are discussing here is “digital denture,” virtually all of the workflows commonly being presented today begin with a fundamentally conventional impression and bite relationship process.

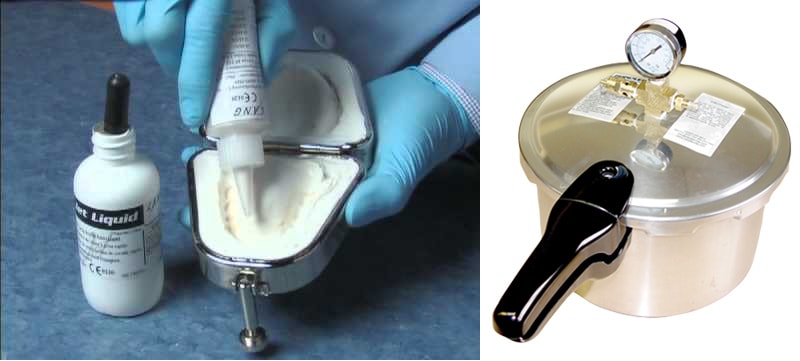
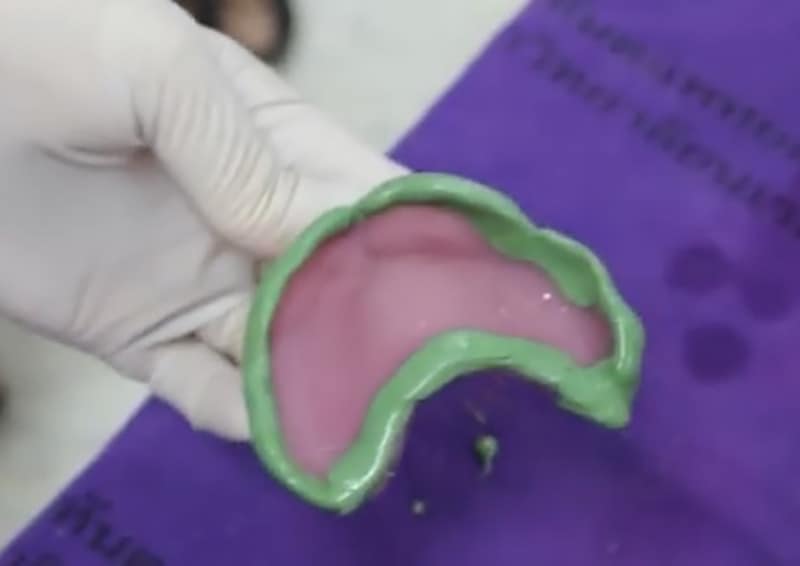
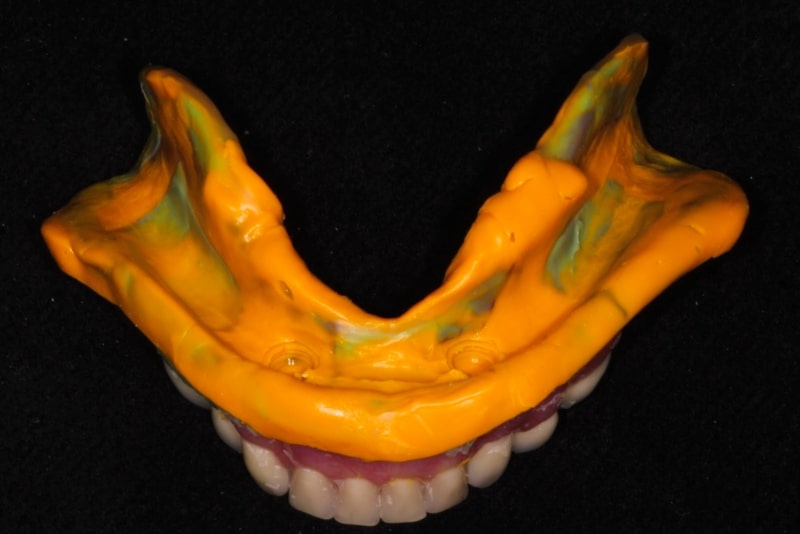
Examples of  denture impression systems:

What I will present today is a way to cut the number of your appointments down from 5 to 3, digital or conventional. This will outline the basic steps for a technique that I have seen Dr. Cory Glenn and other digital gurus use for the initial appointment. Then they scan the primary/final impression records taken, and the rest of the process is digital. These steps are used by several of our clinicians within a conventional workflow as well.

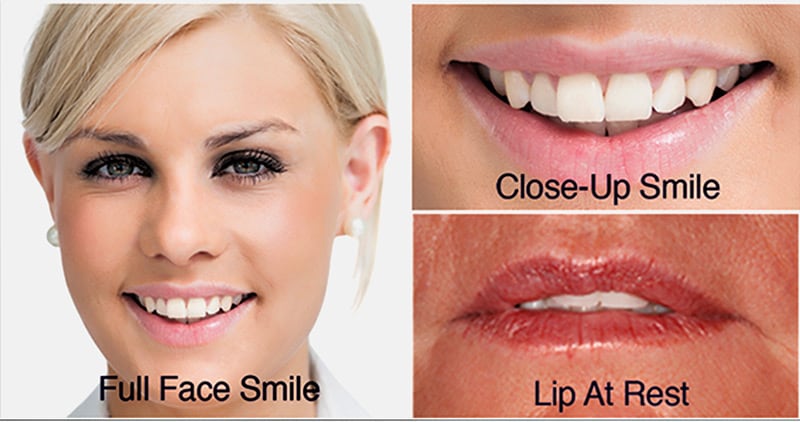
It is ALL about taking the time on the FIRST appointment. It takes sharpening your "lab" skills a bit and creating and collecting records in your first clinical appointment that will be the foundation to go straight to set-up on second appointments in most, if not all of your cases.
Burbank Dental Lab
1. Measure VDO
  • Measure vertical and take pictures of vertical measurement with a caliper.
  • Mark tip of nose and chin, and measure vertical dimension at physiologic rest position.

Measure VDO - Figure 1

Handmade Software, Inc. Image Alchemy v1.13

2. Measure the lip closure line

  • The lip closure line is one of the most important pieces of information, in particular for the length of the anterior teeth. The Papillameter is the ideal instrument for measuring the length of the upper lip and the lip closure line. The Papillameter is made of a sterilizable and disinfectable resin.

Measure VDO and Lip Closure Line - Fig. 2 and 3

  • Duplicating the denture is a first appointment way to capture, occlusion, bite record, VDO, Midline, and also used as a custom tray-capture final impression.

Denture duplicaiton flask - Fig. 4

  • Duplicate denture(s) in a denture duplicating flask. (Lang dental)
  1. Lubricate denture with vasoline or similar.
  2. Using alginate, fill one side of the flask and submerge occlusal side of denture into the impression material up to the peripheral roll.
  3. After impression sets up, lubricate intaglio of denture and impression material.
  4. Fill the empty side of the flask, close, and fasten set screw.
  5. After the impression is set, open flask and carefully remove denture.
  6. Fill both sides of the impression with a cold cure acrylic, and place in pressure pot with warm water at 30 psi. for about 10 minutes.

    Fill both sides and place in pressure pot - Fig. 5 and 6

  7. Remove duplicate denture, inspect, and compare to make sure it is an accurate duplicate.

1. Using duplicate denture as a custom tray, paint inside with tray adhesive.
Make a border impression with putty. Cover the peripheral roll and extend into the vestibule.

Custom tray for dental impressions

2. Make sure that borders are extended into the vestibule, but do not impinge on muscle attachment landmarks. Have the patient go through motions and sucking actions to capture muscle attachment positions.

  • Extend impression to the retro-molar pads on the mandibular, and post-dam area, and Hamular Notch on maxillary.

Massad Tray Border Molding for Maxillary Denture - Fig. 8

  • After putty impression, take a medium body and wash impression and repeat motions and sucking action. 

3. Before the final wash impression, remove any areas where the tray kisses through the body impression. (Relieve 1-2 mm )

Denture reline impression - Fig. 9

  • Check vertical with relined final impression duplicate denture(s).
  • With relined duplicate denture inserted, evaluate the facial dimensions and appearance.
  • Measure the same 2 dots on the nose and chin again to assist in evaluating vertical.

If vertical is satisfactory proceed as follows:

  • Take a face bow record using Kois Facial Analyzer. Be sure to record facial midline with the vertical rod positioned. We highly recommend using the Kois Facial Analyzer to record the horizontal smile line and facial midline of the old denture(s).

KOIS Face bow - Fig 10

  • Take a bite with PVS bite registration material.
  • Mark facial midline on denture

If you need to increase vertical:

  • Add slices of pink base-plate wax to occlusal until vertical is satisfactory.
  • Follow steps above with pink wax in place as bite record.
  • Close-up or smile
  • Full face smile
  • Repose of lip at rest

Over-all shade picture

Communicate to dental lab all changes from current denture, especially incisal edge positions in the smile. Include both incisal edge position vertically to the lip and anterior-posterior shift changes.

Burbank Dental Lab

Send to the lab to fabricate teeth set-up try-in.

The lab can now articulate a duplicate denture/custom tray and proceed to set-up.

Today we have options both digital and conventional to fabricate a set-up for try-in from the records described above.

Conventional Workflow in Lab

Baseplate, wax and set denture teeth up in wax for try-in.

Digital Workflow in Lab

We can scan the impression, and the articulated duplicate denture, and poured models, and design the set-up via CAD systems like 3Shape, Blue Sky Plan, Exocad. When working in the digital environment we are then able to mill or print a one-piece monolithic set-up try-in.

Identico

Monolithic Teeth Try-in

One very distinct benefit of milling the set-up try-in is that the fit will be virtually 100% the same as the final fit, and will be vastly superior to the fit of baseplates, or dentures processed by other methods. (More to come about milled denture in the near future.)

3D Printed Denture tryin - Fig. 13

2nd Appointment

Try-in Teeth Set-up and Evaluate. Notate any changes and communicate directions for the lab to finish or provide a 2nd set-up try-in.

Try-in teeth setup - Fig. 14

3rd Appointment

The final denture is delivered.
This workflow, regardless whether the workflow will become digital or conventional, is one of the surest ways to save more than one appointment of your valuable chair-time, and increase the quality of the final denture product.
Invoclar Milling Solutions at Burbank Dental Lab
Denture - Fig. 16

Did you like this article?

Let us know by giving us a clap!

2+

Top 10 Most Clapped Articles

Resource Center

Products

Slide 1

Fabrication
of the future
is here!

Burbank Dental Lab has three new state-of-the-art Carbon M2 printers. We are very excited about the options that these cutting-edge printers will allow us to offer our dental clients. Here are some of the advantages that these printers will begin to deliver to you and your dental practice.

Our New
State-Of-The-Art
3d Printers

Carbon offers a highly dependable 3D manufacturing solution for many dental applications with its breakthrough Digital Light Synthesis™ technology, enabled by a wide range of dental materials.