


How do you begin a full mouth rehabilitation case?
Full mouth rehabilitation cases can deliver life-changing results for the patient. They can also be quite an achievement in your clinical career and do wonders for your production. The truth is that most dental practices have hundreds of thousands of dollars worth of production that is under-diagnosed each year. The problem is, how do you begin such a big case?
Burbank Dental Lab was recently privileged to participate in Dr. Frank Spear’s Facially-Generated Treatment Planning Course. What we learned changed how we think about these large restorative cases.
Learning the basic rules that Dr. Spear covered in this course taught us to focus on one step at a time. There are four factors that need to be evaluated when embarking on a full mouth rehabilitation:
- esthetics
- function
- structure
- and biology
For the purpose of this article, I will focus on esthetics and function. In this article, we will address cases that do not have skeletal issues or acute muscle and joint problems. All rehabilitation cases should include a muscle and joint evaluation.
Esthetics
- Tooth position relative to the face
- Incisal edge position - be sure to evaluate display of central incisor incisal edge to face
- Facial midline
- Incisal plane/smile line
- Maxillary inclination of the anterior teeth
- Maxillary occlusal plane in ideal relation to the desired anterior tooth position.
- Gingiva margin and papillae
- Arrangement (alignment and position)
- Contour (proportion and outline form)
Function
- Vertical Opening
- Overjet
- Overbite
- Occlusion
Evaluate Incisal Edge Position of Central Incisors
- Evaluate tooth display with the lip at rest. An average at rest tooth display of 1-3 mm is pleasing for most people.
- Evaluate in a full smile.
- A 7-11mm of tooth and tissue exposure on the average.
- Ideal Goal: full smile, slight display of gingiva of centrals, 9.5-11 mm. long.

REQUEST YOUR FREE IMPLANT SUCCESS GUIDE BELOW
Success Guides
Case Study Example Using Incisal Edge Position As a Starting Place
Treating Dentist & Photos Provided By: Dr. Mark Tyma, DMD, Doylestown, PA
This example case was restored with e.max restorations on 2,3, 6-11, 18-20, 22, 27 and two Lava Bridges 13-15, 29-31 and a screw-retained implant bridge 29-3. There was also some gingival re-contouring.
I remember when this case came to my desk, it was obviously going to be a challenging case. We were beginning a full mouth wax-up and were not sure where to start. I then recalled one of the core principles of facially-generated treatment planning and asked, "Where do we want the central incisors positioned in the face?" I looked at the lip at rest picture, then the smile picture, and determined what had to happen to the central incisors to make the smile line up with the goals of a facially generated treatment plan. Then we were ready to begin the wax-up.
The key that unlocked this case and any future case was defining the first step, which establishes the rest of the case choices. The initial focus is the incisal edge position of the centrals following the guidelines above.
With this information in hand, we began the diagnostic wax-up with the two central incisors. We determined what needed to happen to the central incisors in order to put the incisors in the desired position.
- Looking at the lip at rest photo, there was no display of the maxillary central incisors.
-

- Evaluating the smile photo, we can see that the incisors are retroclined and up to 3 mm too short.
-
Maxillary Wax-Up
After evaluation of the current incisal edge position, we decided to lengthen the centrals about 2 mm and procline all of the incisors.
- Fig. 3 - Maxillary - Anterior Wax-Up-
After the incisors were positioned in the wax up, there was a template to establish the maxillary occlusal plane. The posteriors were waxed to have an idealized occlusal plane in relation to the anterior teeth.Mandibular Wax-Up
After the maxillary teeth were waxed, the lowers were waxed to the maxillaries. The anterior bite was opened 2 mm in order to have space to level the lower occlusal plane. The lower incisors were slightly retroclined in the incisal 1/3 and lengthened to occlude more ideally with the maxillary anteriors.
The wax-up provided a template for the provisionals created chairside.
The provisionals were worn for several weeks. There were occlusal adjustments made and the anteriors were lengthened 1 mm. Once the patient approved the provisionals, impressions of the temps were taken and sent to the lab along with the final prep impression.
The final restorations were made for the entire case by Burbank Dental Lab. At the 6-month recall, the #10 was chipped and was replaced with additional adjustments to the lower opposing. The whole case has been in with no additional damage for 7.5 years.
Figure 5 - Final restorationsNote: The patient was not willing to undergo orthodontics or surgical options. The full treatment was completed restoratively with some gingival re-contouring and endodontic treatment.
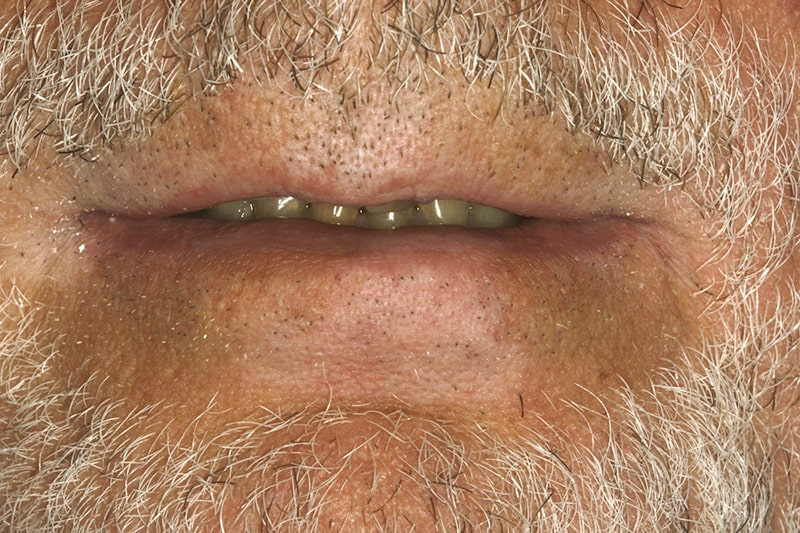
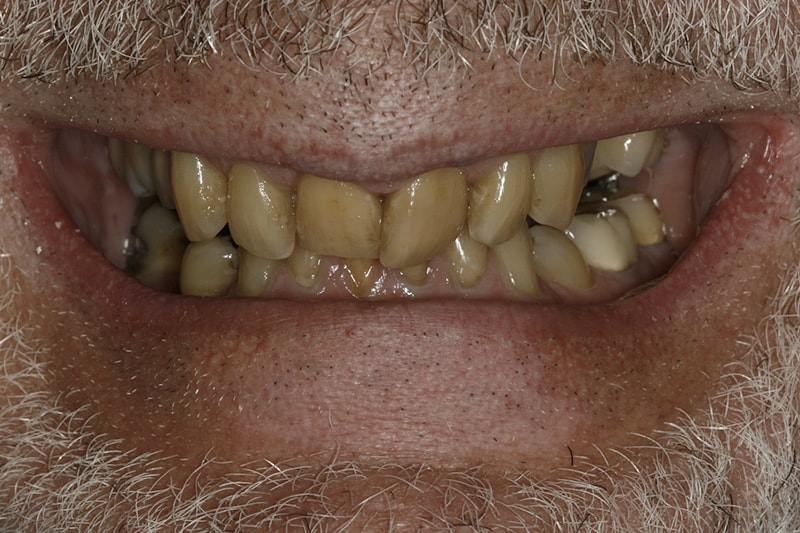
 Fig. 3 - Maxillary - Anterior Wax-Up
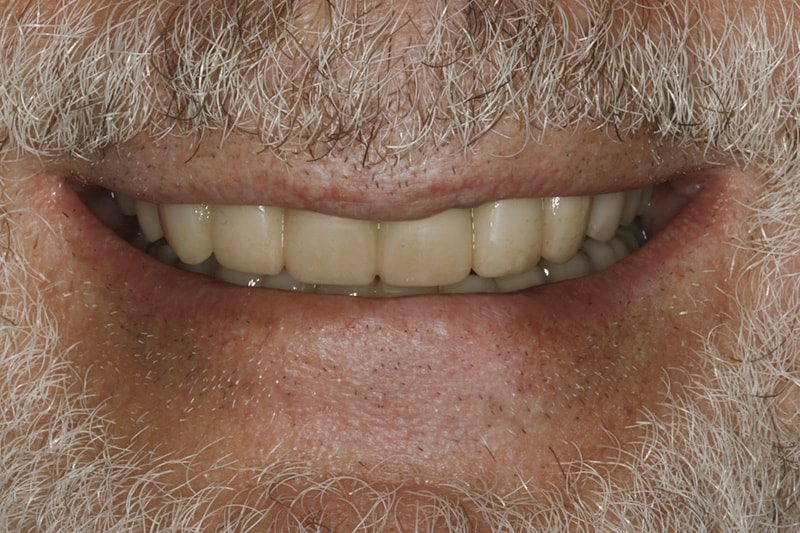
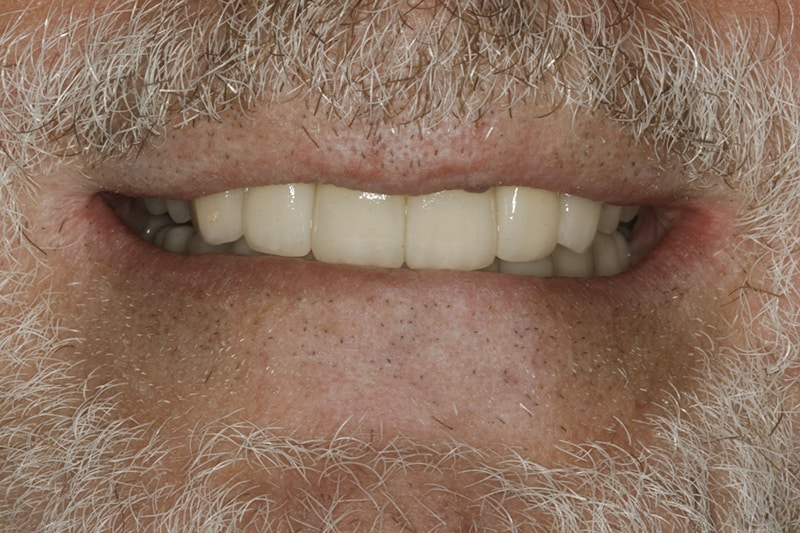 Figure 5 - Final restorations
What is your pathway to success for rehabilitation cases?
At the first diagnostic appointment collect:
- Full face smile photo
- Close-up smile photo
- Close-up lip at rest / repose photo
- Upper and lower models
Evaluate & Determine
- Maxillary tooth position and gingival levels esthetics.
- Mandibular tooth position, and esthetics.
- Occlusal relationship
- Muscle and joint evaluation
Initial Lab Steps
- Additive Wax-up
- Prepping the teeth on the model only where needed and additive
- Beginning with the central incisor position and using that as the landmark for the rest of the wax-up.
- Provisionals based on diagnostic wax-up.
- Chairside or Lab processed provisionals.
- Occlusal splint/anatomical orthotic.
Once the provisionals are tested and adjusted in the patient's mouth for at least two weeks, the final restorations can be fabricated with maximum clinical and esthetic success.
In Conclusion
The initial steps of photos, models and well designed diagnostic wax-up based on positioning the maxillary incisors in an ideal facial position, will simplify the decision-making process and maximize your success.


